In this tutorial:
1. Adding IP to Firewall 2. Connecting with PuTTY, OpenSSH, or Terminal
In this tutorial, we will show you how to connect to your dedicated server via SSH. This will allow you to interface with your server via Command Line Interface (CLI). First, we will show you how to add your IP address to the firewall to allow you to access your dedicated server. Then we will show you how to connect with both PuTTY, and Terminal.
Know you’ll always be able to reach your customers when they need you with our Dedicated Hosting Services.
1. Add your IP to the firewall
- Look up your IP address. Write it down so you have it for later use.
- Login to WHM.
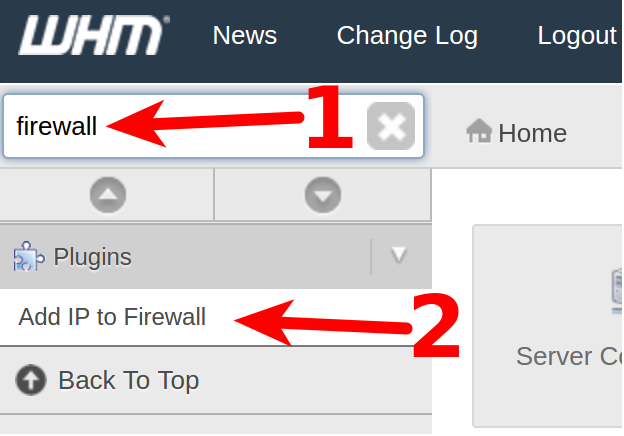
- Type firewall in the search box, then click the Add IP to Firewall link in the navigation menu.
- In the Allow Rule field, enter your IP address.
- Click the Add Rule / Restart button.
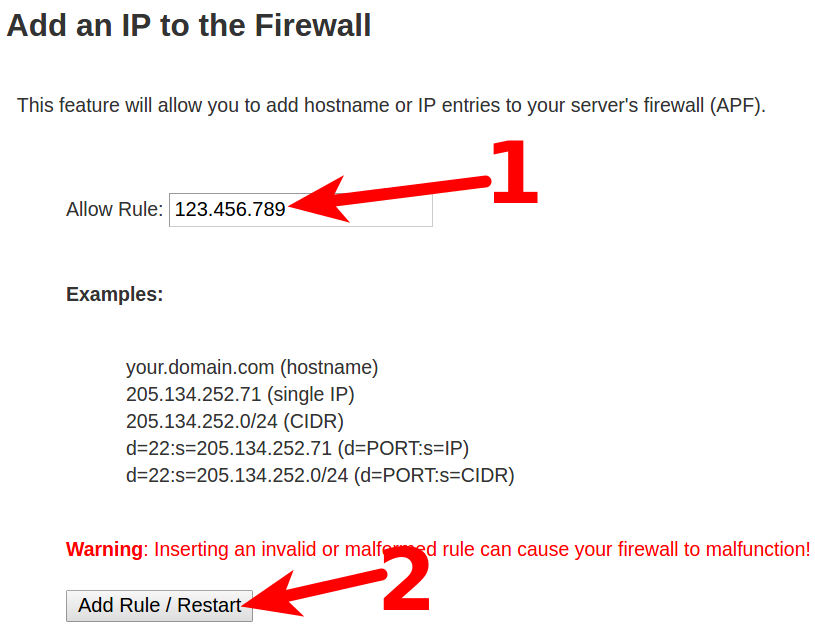
You are finished when you see a message stating “Your IP(s) have been added, and APF is being restarted.”
2. Connect using PuTTY or Terminal
After adding your IP address to the firewall, you can connect to the server using a client (such as PuTTY), or directly in terminal (if you are a Linux, or Mac user). This section includes guides for both PuTTY and Terminal.
Connecting to your Dedicated Server via PuTTY
- Download and Install PuTTY.
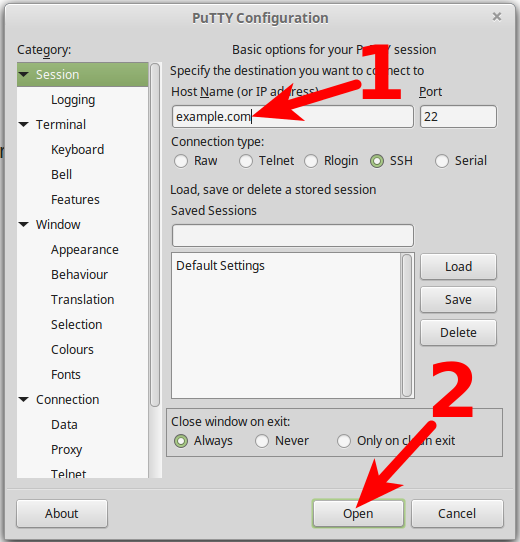
- In the Host Name (or IP address) field, enter your domain name, or the <>IP address of our Dedicated server.
- Click the Open button.
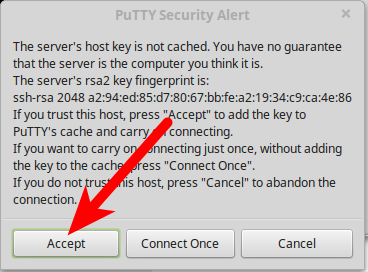
- You will see a PuTTY Security Alert, click the Accept button.
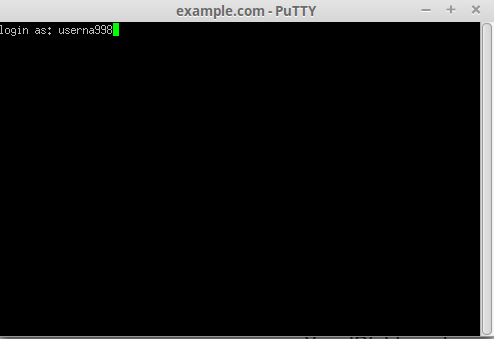
- When the login as message comes up, enter your username (cPanel username, or root), then click the Enter key.
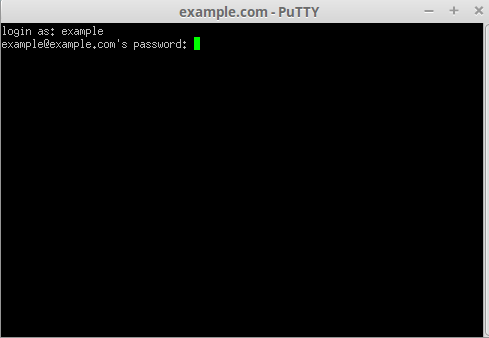
- Enter your cpanel password (or root password if you are conecting as the root user), then click the Enter key. The password will not show when you type it.
Connecting to your Dedicated Server via Windows OpenSSH
OpenSSH is natively included with Windows 10. Use Powershell to access it:
- Open the Start menu and type Powershell
- Select Powershell,then Run as Administrator
- Continue to the Unix instructions below
Connecting to your Dedicated Server via Terminal
- Open the terminal on your computer.
- Type ssh, followed by a space. Then your username, followed by the ‘@’ symbol, and your domain (or IP address) for the hostname and hit the Enter key. For example: ssh [email protected]
- If you see a message stating “Are you sure you want to continue connecting” type yes, then click the Enter key.
- You will then be prompted to enter your password. Type your password, then click the Enter key to connect. The password will not show when you type it.
Congratulations, now you know how to connect to your server via SSH! Next, consider learning how to navigate the command line structure in SSH.
Learn more about cPanel management from our Managed VPS Hosting Product Guide.
Authenticating with public key “Vishnu [email protected]” from agent
Last login: Mon Jul 1 07:48:41 2019 from [IP Address]
Shell access is not enabled on your account!
If you need shell access please contact support.
VPS users can edit the cPanel user’s access in WHM.
Shared Hosting customers will need to contact our live technical support to fix this.
Where do I get my password? All that I have entered have failed.
As per the instructions above, if a password is used then it is based on either your cPanel user or the root password. If you have neither then you will need to contact our live technical support team in order to help you recover your cPanel password, or you will need to apply for the root password (or recover it if you have lost it). The live support team contact information is at the bottom of the page.
Very good concept, nicely explained with steps.
This very usefull information, i have been searching for info how to connect dedicated server via SSH.
Thanks a lot.