As a dedicated server account owner, you have the ability to control almost everything on your server. One of the more important things you will need to monitor is the version of your cPanel and WHM software. In this article, we will discuss how to configure your server for update handling.
Note: You must have root access in order to follow these directions.
Configuring Update Preferences
- Log into your WHM interface.
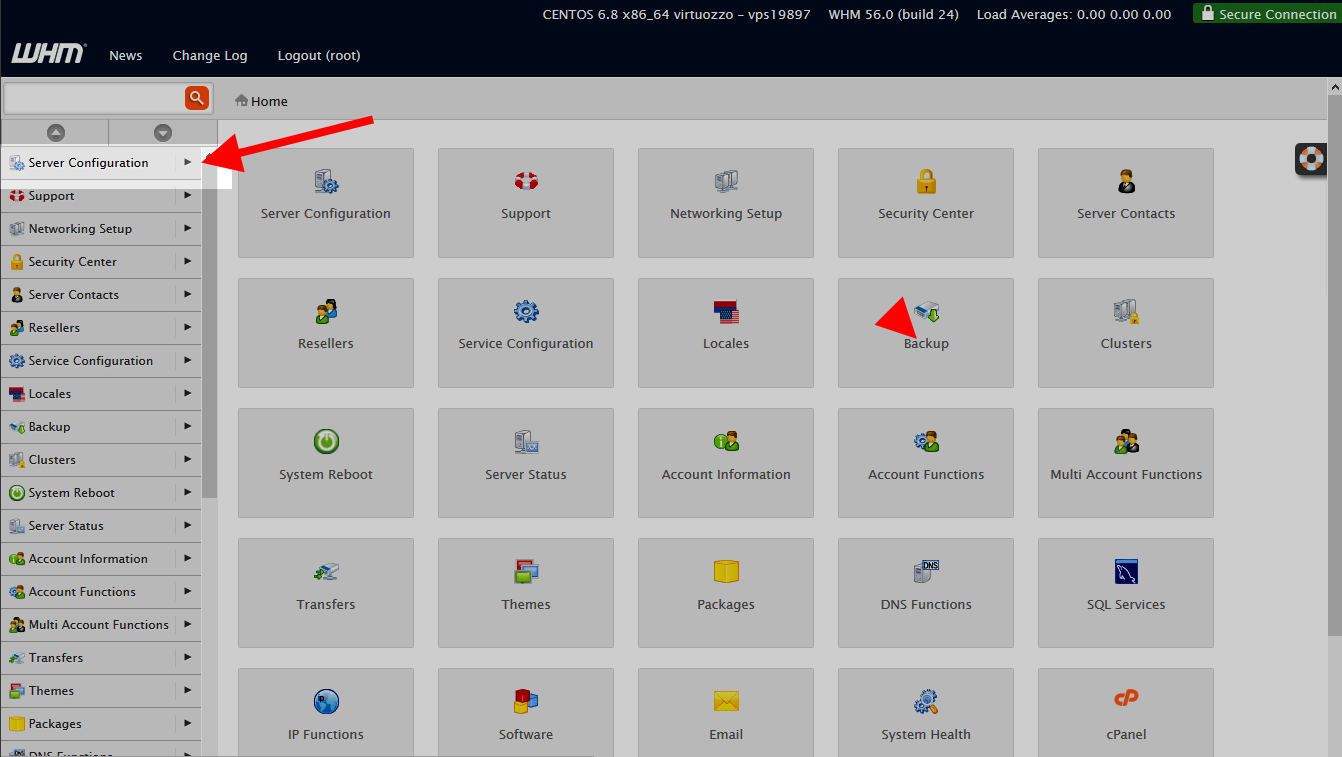
Look at the left-hand side panel and click on the Server Configuration category.
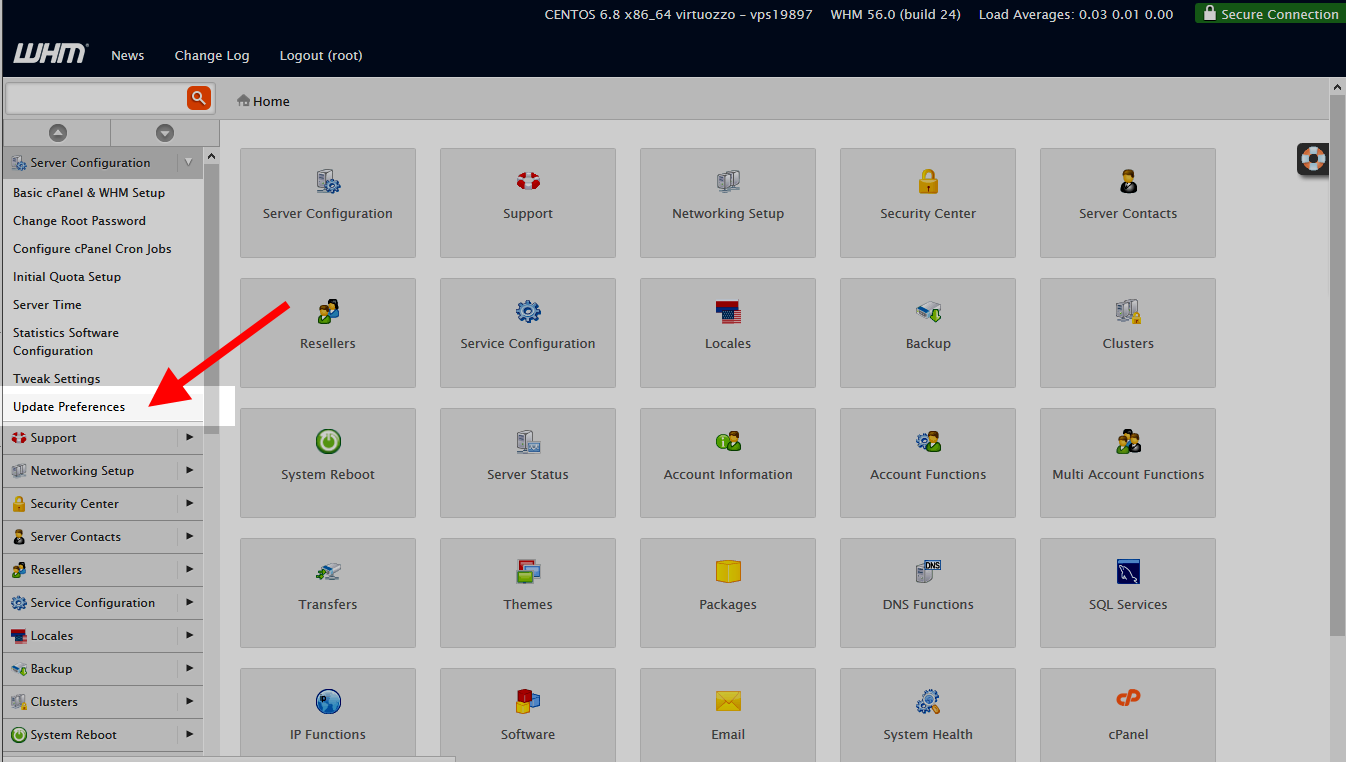
Then click the Update Preferences option.
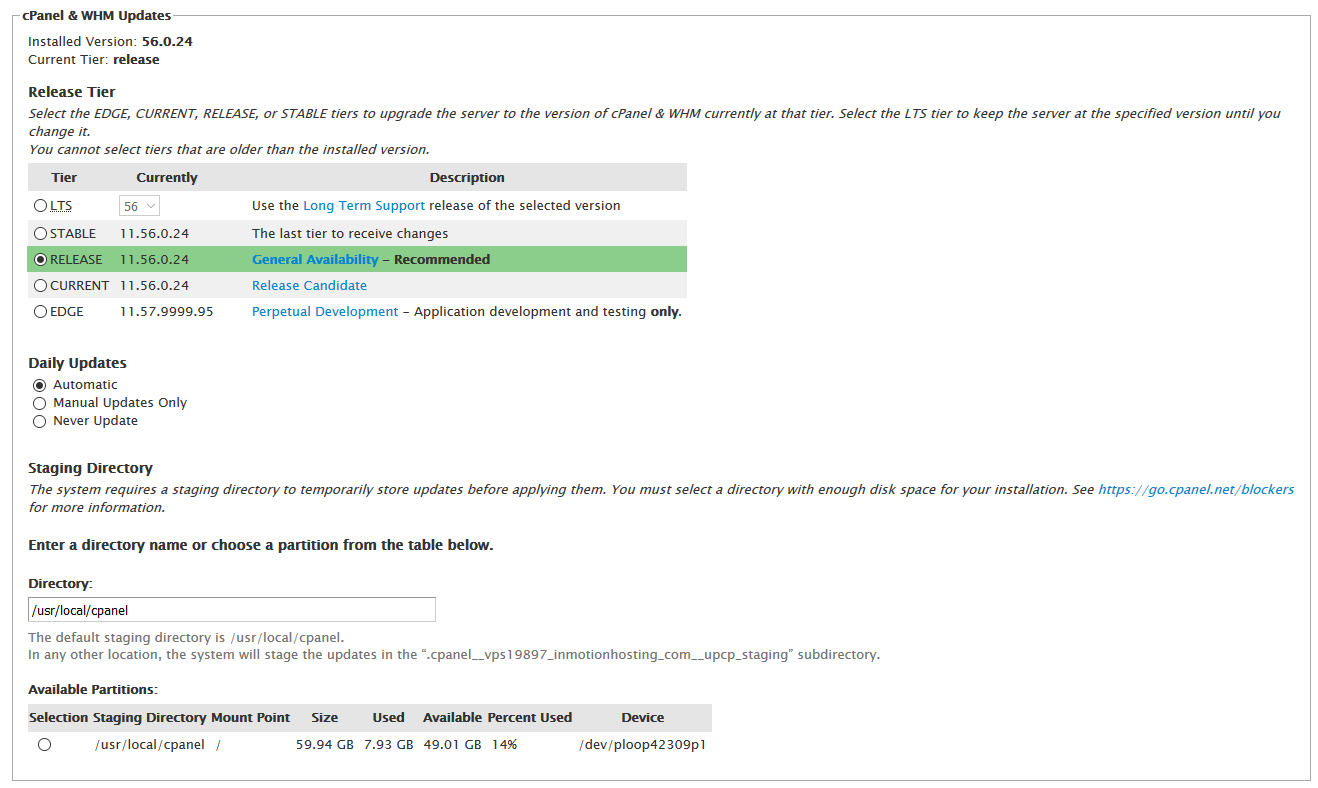
You are taken to the Update Preferences page. First, set your cPanel & WHM Updates.
Release Tier Select the tier to upgrade the server to. It is recommended to use the ‘RELEASE’ option as it is stable for a production environment. Daily Updates Set to Automatic, Manual, or Never. Staging Directory This is the directory that is used to store updates before they are applied. While you can change it, the default is usr/local/cpanel. Available Partitions Select a partition if there are more than one. The path is in the Directory text box. 
Set your Operating System Package Updates. This determines how you allow the nightly maintenance tasks to update your package files from the operating system distribution. From here you will see three options: Automatic, Manual, or Never.

Set your Apache SpamAssassin Rules Updates. This defines how you want to update the SpamAssasin rules. From here you will see three options: Automatic, Manual, or Never.
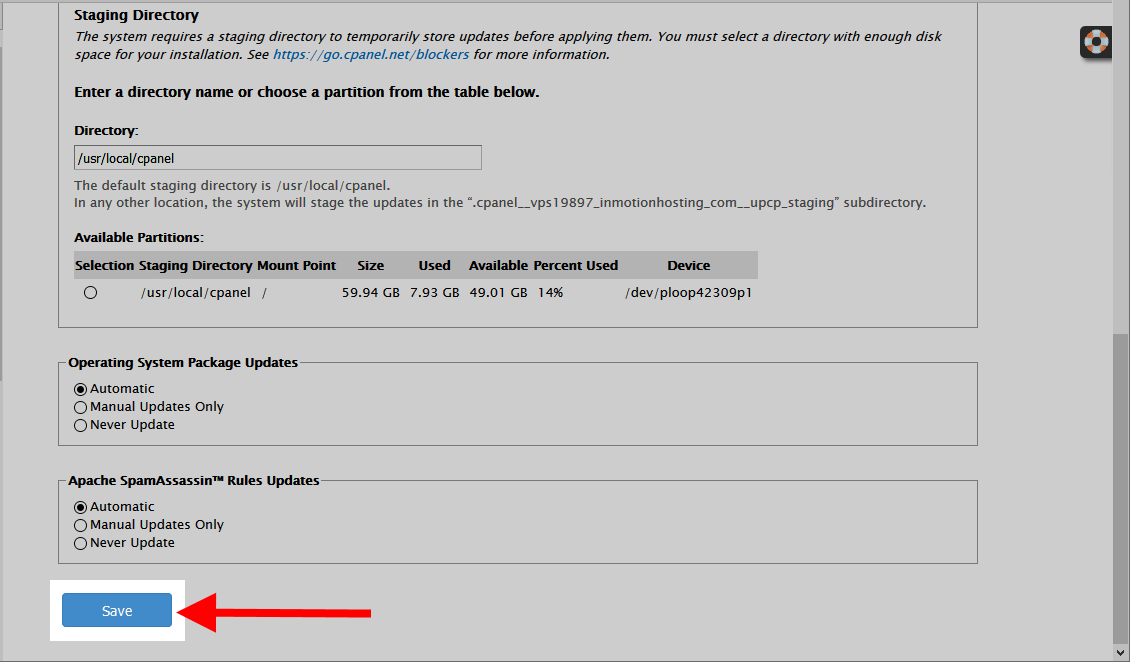
Click the Save button to save your configuration.
Now you know how to configure your updates within the WHM.
Comments
It looks like this article doesn't have any comments yet - you can be the first. If you have any comments or questions, start the conversation!