If you are on a VPS or Dedicated server hosting plan you have the ability to access your WebHost Manager tool, also known as WHM. This allows you access to many more tools to manage your server and hosting accounts. Within the WHM, you have the ability to add custom DNS records. As SPF records are a type of DNS records, you can customize these records should you have the need to do so. This guide will show you how to create a basic SPF record within your WHM.
 You need to know the syntax of your SPF record before entering it below. If you do not know the syntax you need, check out our article on Creating Custom SPF Records.
Creating SPF records within your WHM
- Log into your WHM interface.

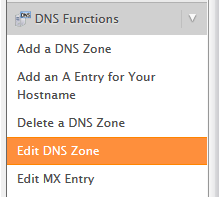
Look to the left sidebar menu,locate the DNS Functions category and click on Edit DNS Zone.

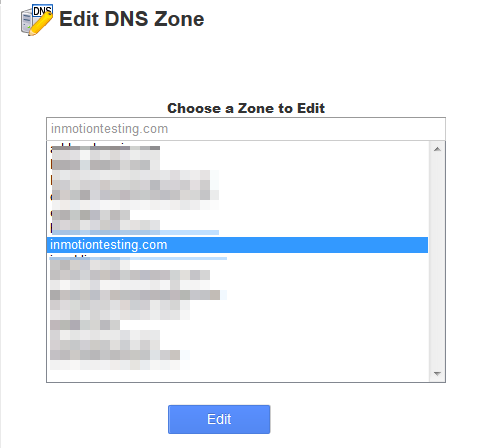
To the right is a list of the domains on your hosting account. Highlight the domain name you want to create the SPF record for and click the Edit button.

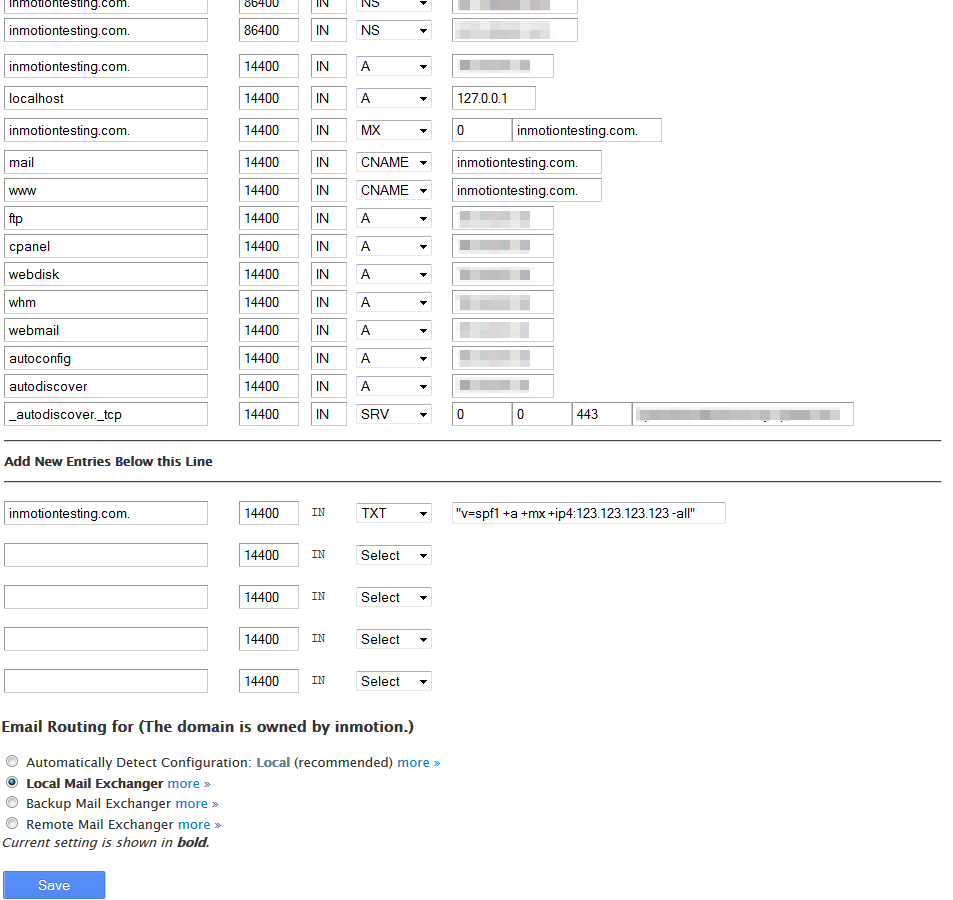
The DNS Zone editor page will appear. Scroll to the bottom of the screen and create your SPF record using the form under Add New Entries Below this Line. There are four separate sections.
Domain Enter the domain name to add a period (.) at the end of the domain name. TTL (Time to Live) This is the time in seconds the record exists before checking for updates. Leaving it at 14400 seconds (4 hours) is recommended. Record Type SPF records always need to be a type of TXT. Record Data Here enter the actual SPF record within the quotation marks. - After entering the information for your SPF record, click on the Save button at the bottom of the page. This will activate your new SPF record for your domain.
Note that DNS changes take up to 24 hours to propagate. This means you need to allow a full 24 hours from the time you make any changes for them to take place across the internet.
Thank you that was very helpful