The “Ordering” tab lets you configure a variety of options that will affect how you manage the ordering process for your customers.These steps will apply for VPS, reseller, as well as dedicated web server hosting.
- Login to your WHMCS Admin

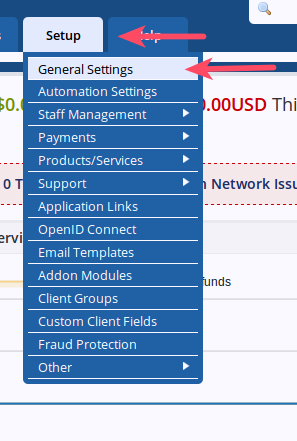
Hover over Setup and choose General Settings

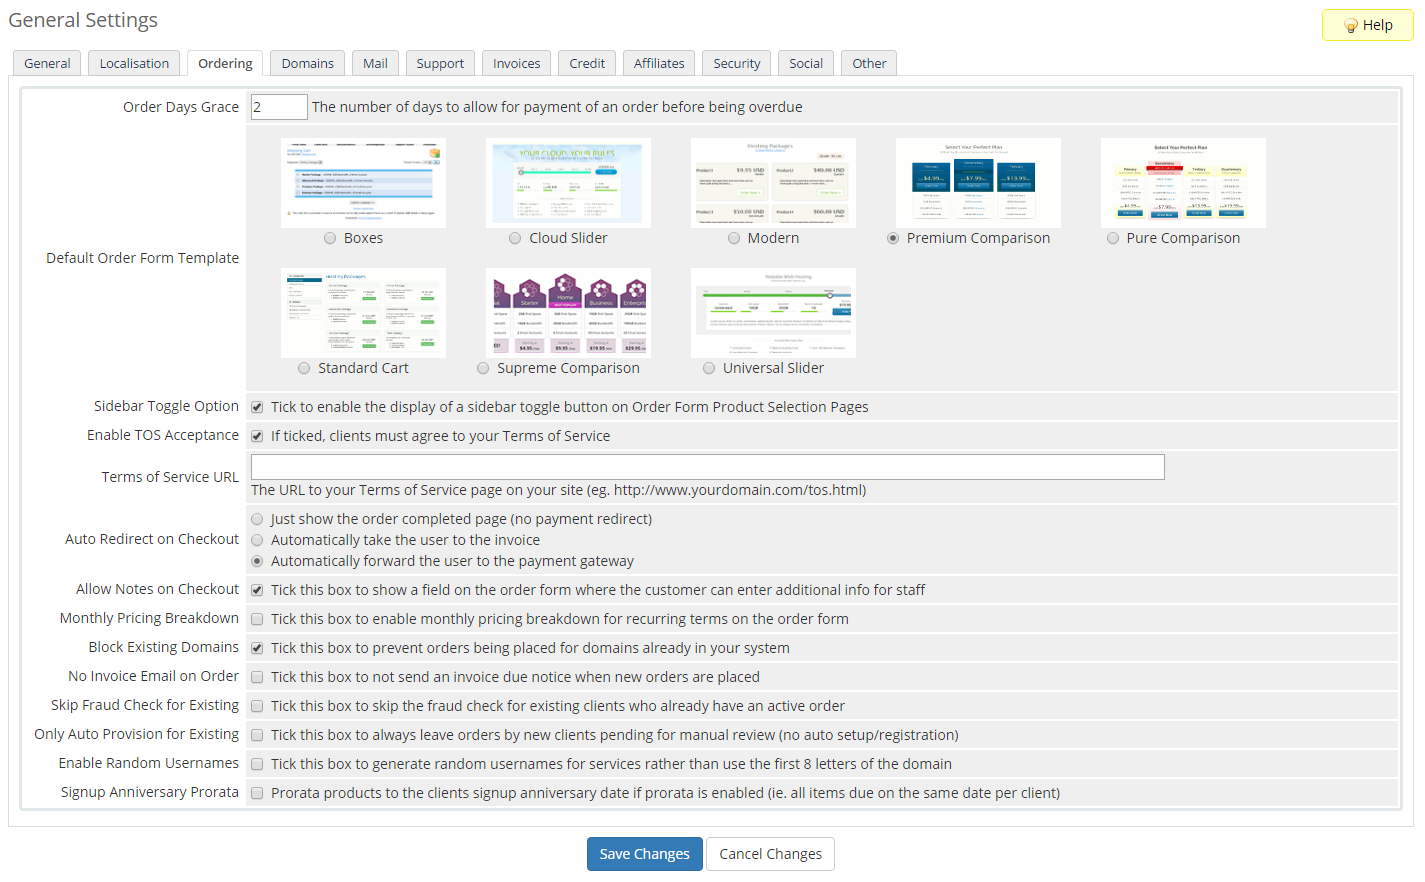
Choose the Orderingtab
- Fill in the settings:
Order Days Grace: The number of days to allow for payment of an order before being overdue Default Order Form Template: Select the form layout you wish to use Sidebar Toggle Option: Tick to enable the display of a sidebar toggle button on Order Form Product Selection Pages Enable TOS Acceptance: If ticked, clients must agree to your Terms of Service Terms of Service URL: The URL to your Terms of Service page on your site (eg. https://www.yourdomain.com/tos.html) Auto Redirect on Checkout: Just show the order completed page (no payment redirect)
Automatically take the user to the invoice
Automatically forward the user to the payment gatewayAllow Notes on Checkout: Tick this box to show a field on the order form where the customer can enter additional info for staff Monthly Pricing Breakdown: Tick this box to enable monthly pricing breakdown for recurring terms on the order form Block Existing Domains: Tick this box to prevent orders being placed for domains already in your system No Invoice Email on Order: Tick this box to not send an invoice due notice when new orders are placed Skip Fraud Check for Existing: Tick this box to skip the fraud check for existing clients who already have an active order Only Auto Provision for Existing: Tick this box to always leave orders by new clients pending for manual review (no auto setup/registration) Enable Random Usernames: Tick this box to generate random usernames for services rather than use the first 8 letters of the domain Signup Anniversary Prorata: Prorata products to the clients signup anniversary date if prorata is enabled (ie. all items due on the same date per client) 
Click Save Changes
Now that you have gone through the Ordering options you are ready to proceed to the Domain tab.
Comments
It looks like this article doesn't have any comments yet - you can be the first. If you have any comments or questions, start the conversation!