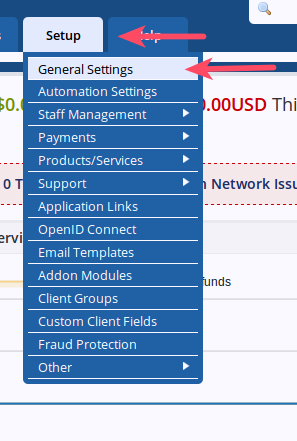
In this article, we are going to show you how to access your General Settings so you can start to configure your basic options. This is the first tab under Setup in the backend of WHMCS. (These step will also apply if you use a Linux dedicated server.)
Finding Your General Settings Menu
- Login to your WHMCS Admin

Hover over Setup

Choose General Settings
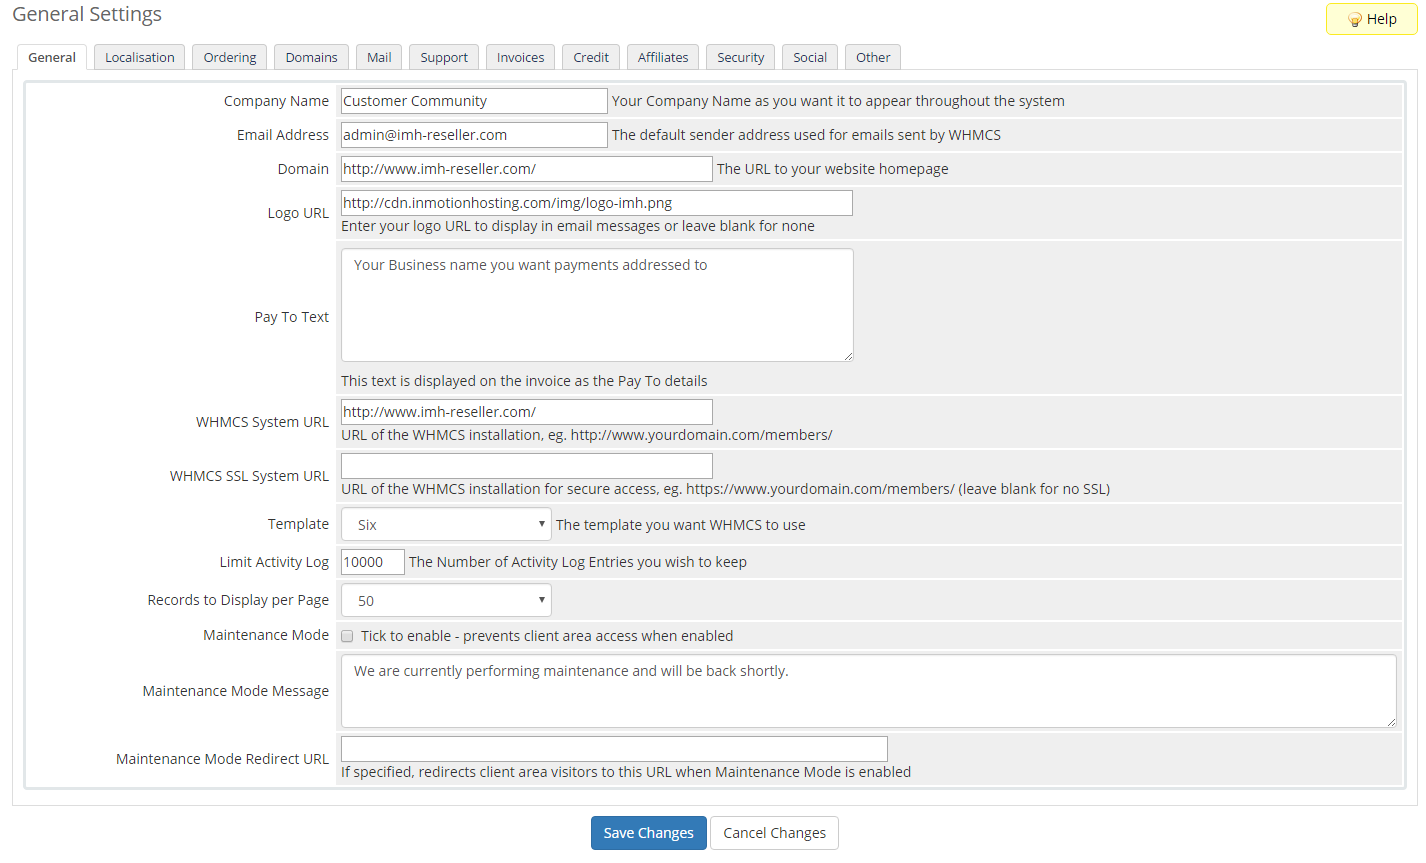
- Fill in the settings:
Company Name: Your Company Name as you want it to appear throughout the system Email Address: The default sender address used for emails sent by WHMCS Domain: The URL to your website homepage Logo URL: Enter your logo URL to display in email messages or leave blank for none Pay To Text: This text is displayed on the invoice as the Pay To details WHMCS System URL: URL of the WHMCS installation, eg. https://www.example.com/members/ WHMCS SSL System URL: URL of the WHMCS installation for secure access, eg. https://www.yourdomain.com/members/ (leave blank for no SSL) Template: Select the template you want to use for WHMCS Limit Activity Log: The number of activity log entries you wish to keep Records to Display per Page: List the number of log messages you want to display Maintenance Mode: Check the box to enable, prevents clients from making changes while site is under maintenance Maintenance Mode Message: Type the maintenance message you would like to display Maintenance Mode Redirect URL: If specified, redirects client area visitors to this URL when Maintenance Mode is enabled (you can leave this blank) 
Click Save Changes
Now that you have gone through the General options you are ready to proceed to the Localisation tab.
Comments
It looks like this article doesn't have any comments yet - you can be the first. If you have any comments or questions, start the conversation!