Backing up your WordPress site is one of the most important tasks for website maintenance. Creating, storing, and maintaining a WordPress backup ensures your website can be quickly restored if disaster strikes.
Luckily, you can easily backup WordPress with the UpdraftPlus Backup plugin. The easy to use tool allows you to create and manage your backups, as well as restore your website with a backup if needed.
Continue reading to learn how to:
- Install the UpdraftPlus Backup Plugin
- Backup WordPress with UpdraftPlus
- Download a WordPress Backup with UpdraftPlus
- View Your WordPress Site Size with UpdraftPlus
- Restore WordPress with UpdraftPlus
- Delete Your UpdraftPlus Settings
- Delete a WordPress Backup with UpdraftPlus
Install the UpdraftPlus Backup Plugin
You must first install and activate the UpdraftPlus Backup plugin before you can benefit from its features. To install the plugin, follow these steps:
- Log into your WordPress Dashboard.
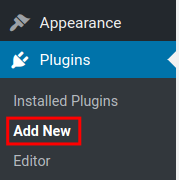
- Navigate to Plugins > Add New.
- Type “updraftplus” in the available search field.
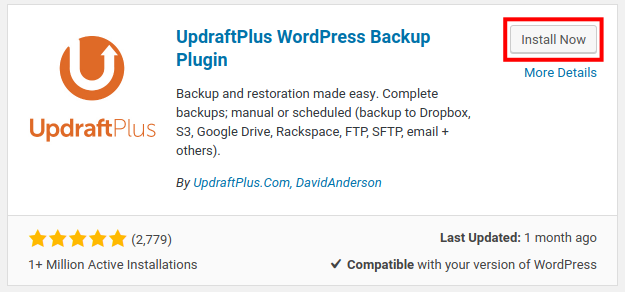
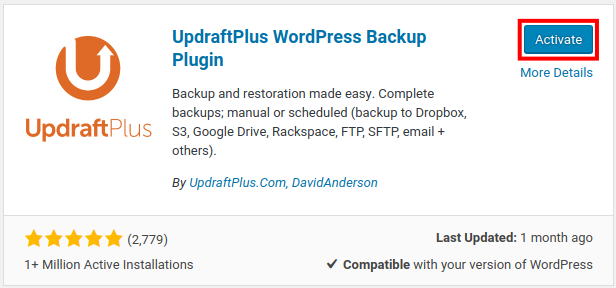
- You will see the UpdraftPlus WordPress Backup Plugin listed. Click the Install Now, then Activate.
- You are finished when you see a “Plugin activated” message.
Backup WordPress with UpdraftPlus
With the plugin installed, your next step is to create a backup for your WordPress website. This is a crucial step before performing maintenance or updates to your site, as it allows you to easily revert changes if you experience problems. The backups will also be critical when recovering from a website hack or malware.
To backup your WordPress site with UpdraftPlus, follow these steps:
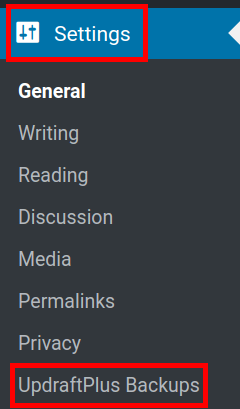
- Click Settings > UpdraftPlus Backups in the left navigation menu.
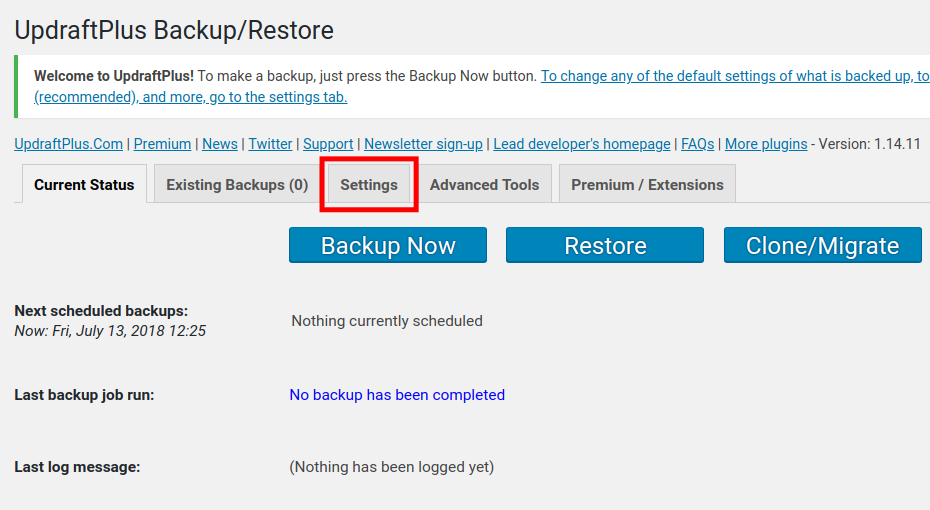
- Open the Settings tab.
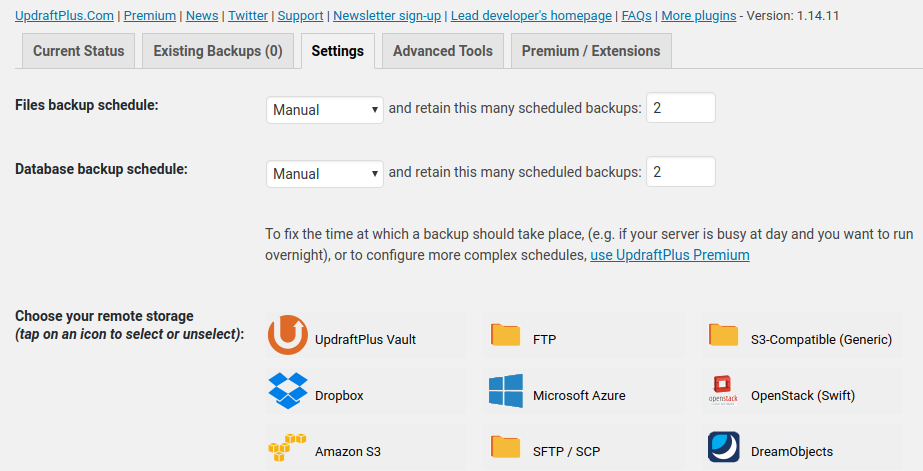
- Choose your settings. Below is an outline of the available options.
- Once you have chosen your backups settings, click Save Changes.
- You will then see a message stating “Your settings have been saved.” Your backups will run as scheduled if you chose that option.
| Option | Description |
| Files backup schedule | Choose if you want to perform file backups on a schedule, and how many backups you want to keep. |
| Database backup schedule | Choose if you want to perform database backups on a schedule, and how many backups you want to keep. |
| Choose your remote storage | Select from a list of remote storage options such as FTP, Google Drive, Amazon S3, or Dropbox among others. |
| Include in files backup | Select what you want to include or exclude in the files backup here. |
| Database encryption phrase | **This is a premium feature. Choose if you want to encrypt your database backup. |
| If you want to receive a backup report via email check this box. It will be sent to the admin address of your website. | |
| Expert settings | Click the Show expert settings link to view additional options. Here you can change the backup directory, disable SSL verification, enable debug mode (for backups), and delete local backups among other things. |
To perform a manual backup immediately:
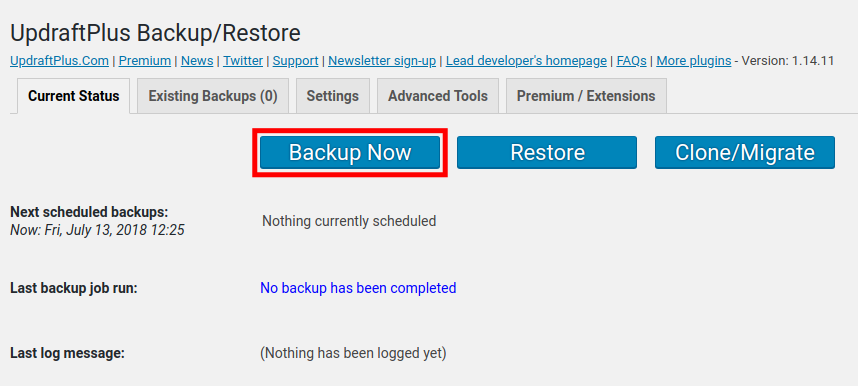
- Open Current Status and click Backup Now.
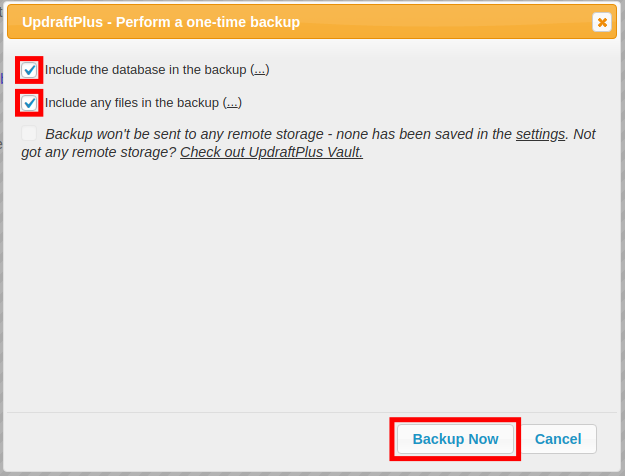
- Choose if you want to include the database and files in the backup, then click Backup Now.
- The backup will begin to run. Backup time will be based on the size of your files and database. The Last log message section will show “complete” when it finishes.
Download a WordPress Backup with UpdraftPlus
The UpdraftPlus Backup plugin also allows you to download your WordPress backups for safekeeping on your local computer or other storage areas. You can easily download a backup by:
- Navigate to Settings > UpdraftPlus Backups.
- Scroll down to Existing Backups to view available backups.
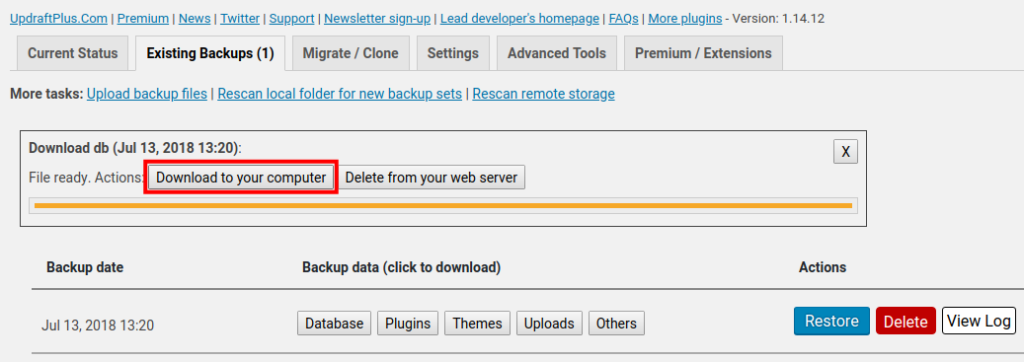
- You will see your backups listed. Click on the backup you want to download. Options are Database, Plugins, Themes, Uploads, and Others. In this example, we are downloading a backup of the Database.
- Click Download to your computer.
- The backup will be downloaded to your computer as a compressed file.
View Your WordPress Site Size with UpdraftPlus
You can also use UpDraftPlus to view the size of your WordPress website. This feature can tell you how much space your plugins, themes, uploads, and other files are using. Which will help you manage your disk space without the need to log into cPanel.
- Navigate to Settings > UpdraftPlus Backups.
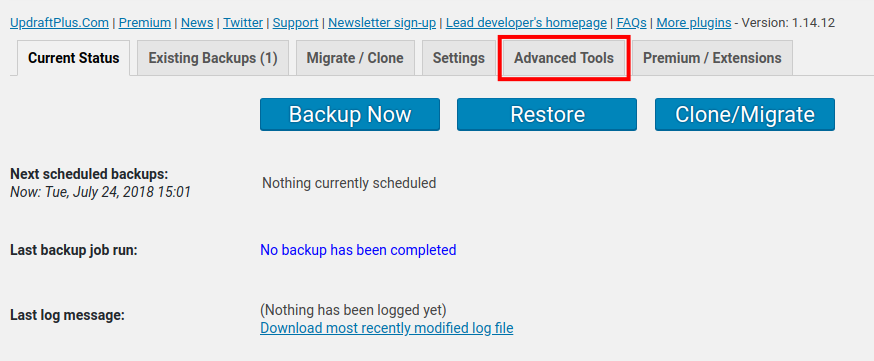
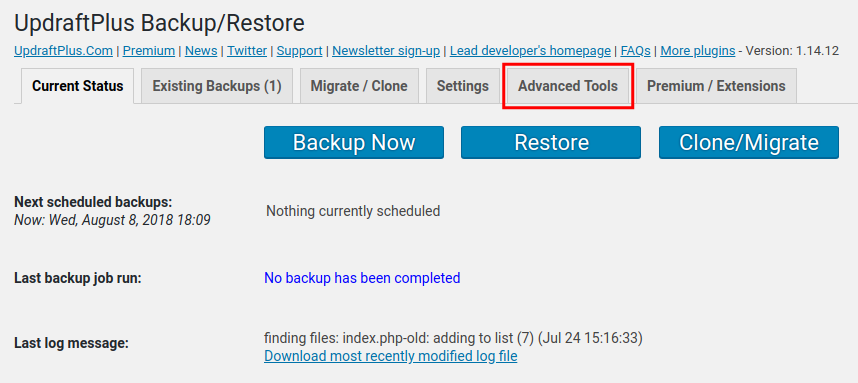
- Click on Advanced Tools.
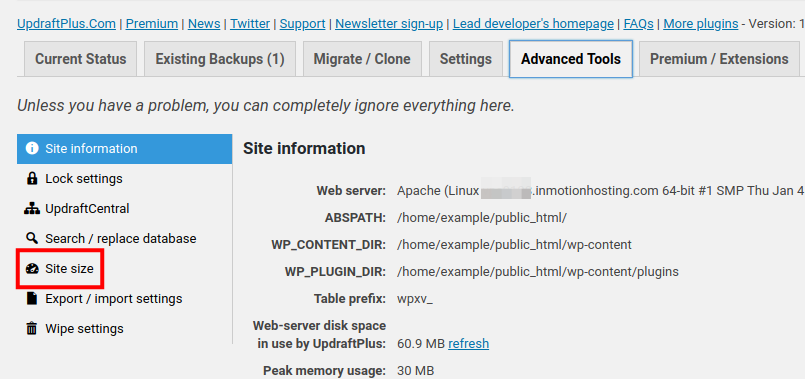
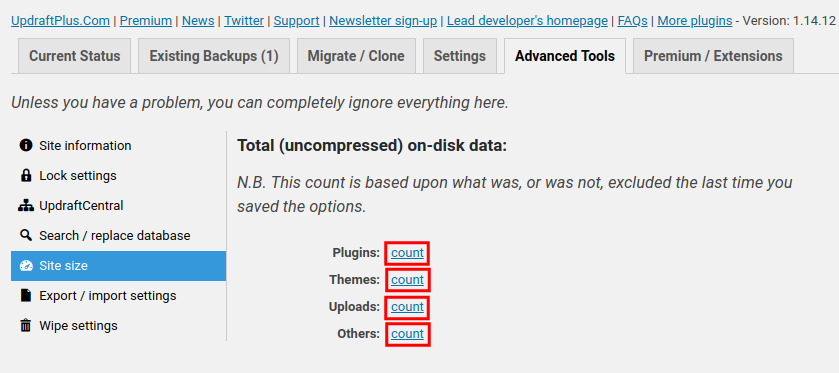
- Click on Site size.
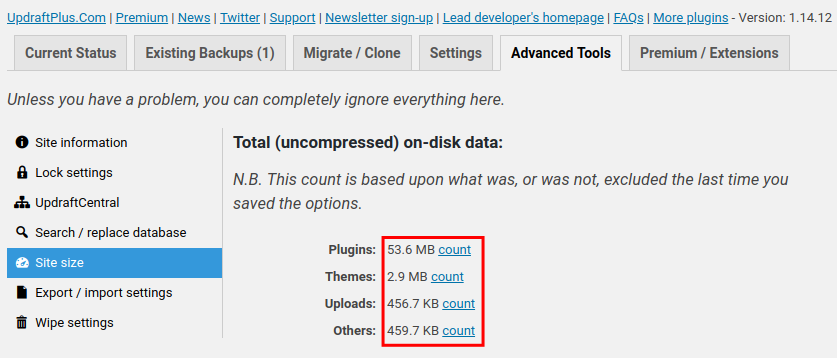
- You will see options for Plugins, Themes, Uploads, and Others listed. Click Count beside each option to view how much disk space they are taking up. It will count and display the size of the files.
Restore WordPress with UpdraftPlus
Using a backup to restore your website after a hack or failed update is easy with UpdraftPlus. To restore your WordPress site with a backup, follow these steps:
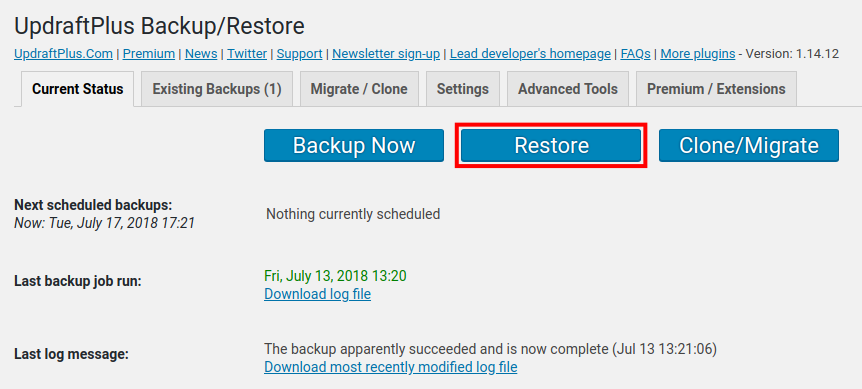
- Navigate to Settings > UpdraftPlus Backups.
- Click Restore.
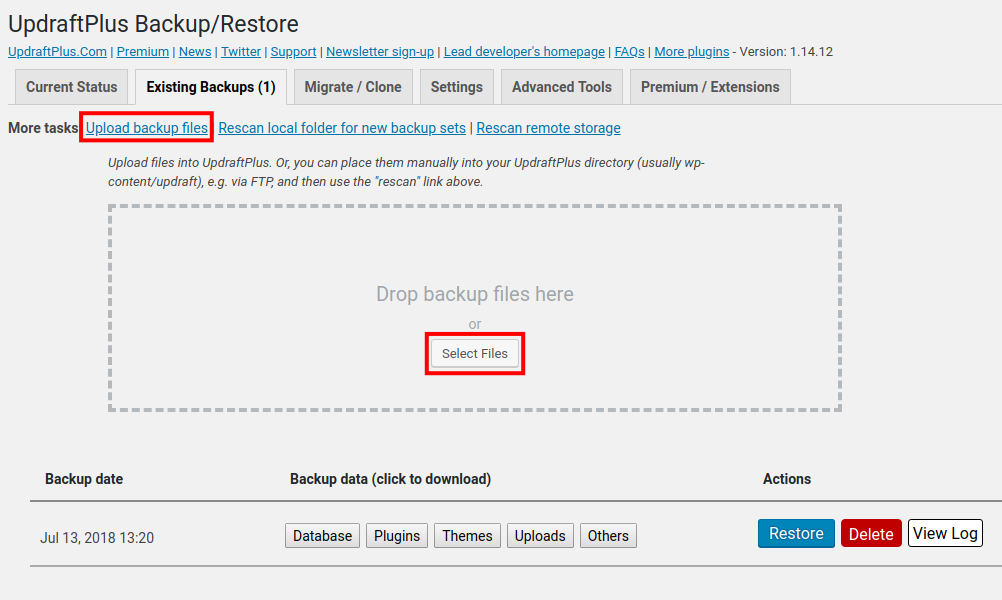
- You will see your backups listed. You can also place a backup file in the /wp-content/updraft folder or upload other backups by clicking Upload backup files > Select Files.
- Next to the backup you want to use, click Restore.
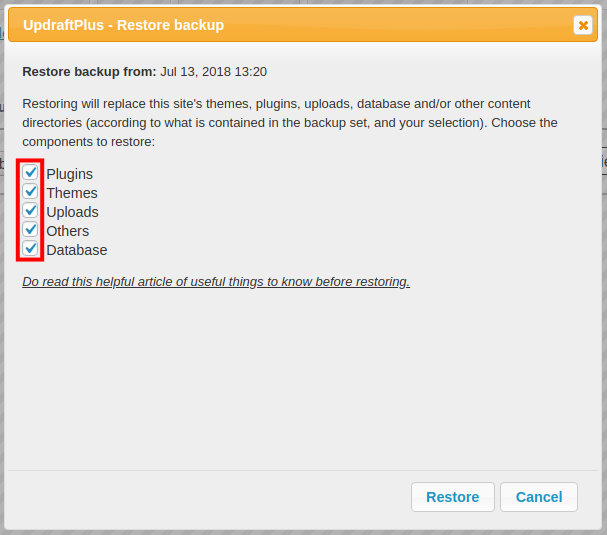
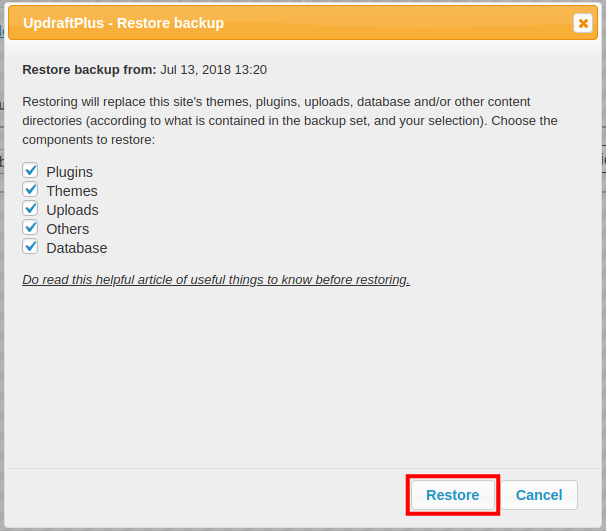
- A box will appear and warn you that “Restoring will replace this site’s themes, plugins, uploads, database and/or other content directories (according to what is contained in the backup set, and your selection). ” Select the items that you want to restore such as Plugins, Themes, Uploads, Others, and Database. In this example, we are restoring everything. Click the Restore.
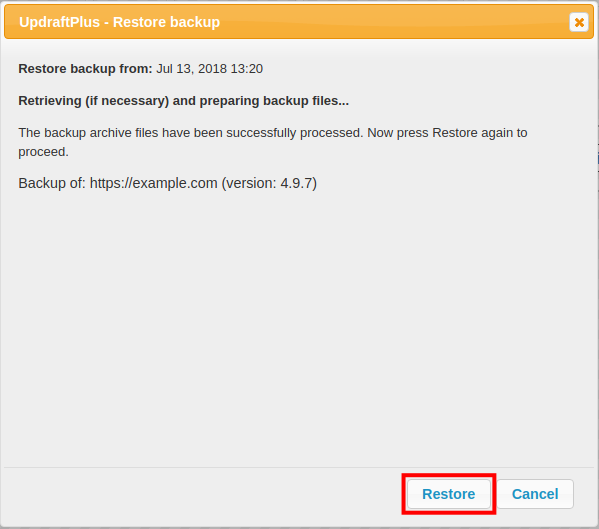
- The backup file will be processed, click the Restore again to begin the restoration.
- Once complete, you will see a “Restore successful” message on the bottom of the UpdraftPlus Restoration Progress page.
Delete Your UpdraftPlus Settings
As your website grows, you may need to delete and re-establish your backup settings. You can do this easily by following the steps below.
- Navigate to Settings > UpdraftPlus Backups.
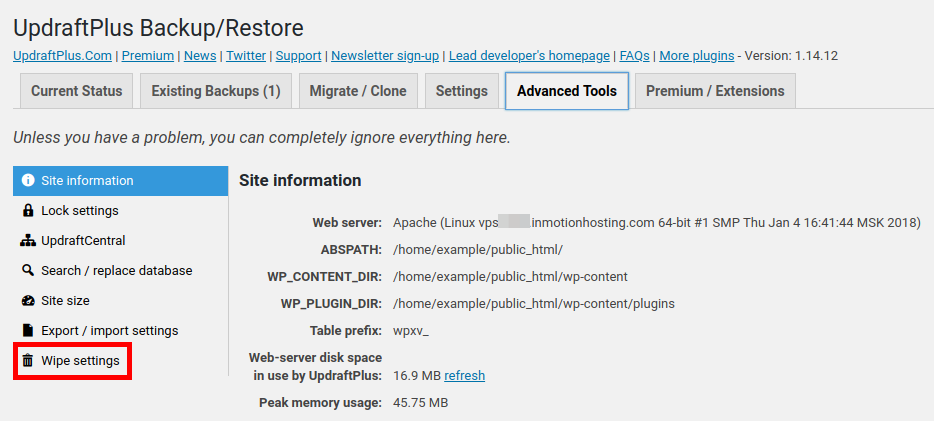
- Click on Advanced Tools.
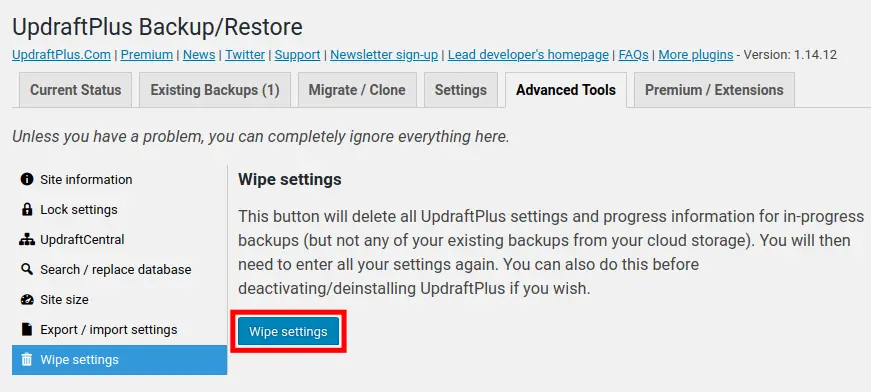
- Click on Wipe settings.
- Click on Wipe settings again.
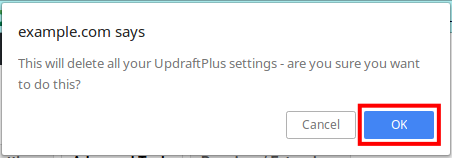
- A warning will pop up stating “This will delete all your UpdraftPlus settings – are you sure you want to do this?.” Click the OK to continue.
- You are finished when you see a message stating “Your settings have been wiped.“
Delete a WordPress Backup with UpdraftPlus
Part of website maintenance is managing your WordPress backups. As time passes, you’ll want to delete old backups to reduce the amount of server space being used. You can do this easily by following the steps below.
- Navigate to Settings > UpdraftPlus Backups.
- Scroll down to Existing Backups.
- You will see your backups listed. Click Delete next to the backups you want to remove from the server.
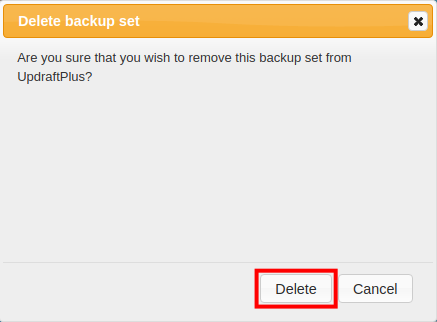
- A pop up will ask “Are you sure that you wish to remove this backup set from UpdraftPlus?” Click Delete permanently delete the backup from your server.
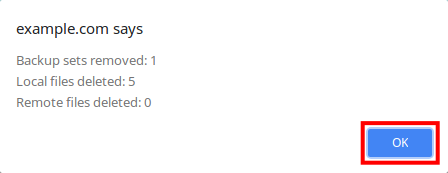
- A pop-up window will provide a summary of what was done. Click OK to return to the UpdraftPlus settings page.
- You can also erase parts of a backup such as Database, Plugins, Themes, Uploads, and Others. Select the files you want to remove, then click Delete from your web server. In this example, we are deleting a Database.
- When it is finished, you will see a message stating “ The file has been deleted.”
Learn more tips and tricks about WordPress backups to protect your website from risks!









Comments
It looks like this article doesn't have any comments yet - you can be the first. If you have any comments or questions, start the conversation!