The Cloudflare content delivery network (CDN) service works well when you need a faster website and your web hosting plan doesn’t include an SSL certificate. In this case, you’d likely be using Cloudflare’s Flexible SSL/TLS encryption mode. This means only traffic between your viewers and Cloudflare is encrypted, not between Cloudflare and your origin web server. This can cause some problems:
- Mixed content errors preventing images from loading securely (can be tested with WhyNoPadlock.com)
- Redirect loop errors preventing the entire page from loading in your browser
- Your website sharing a wildcard SSL with phishing sites (can be tested with Nmap and SSL Shopper SSL Checker)
- SSL stripping, and HTTP downgrade, and other man-in-the-middle (MITM) cyber attacks
All InMotion cPanel-managed plans include the free auto-enabled forever AutoSSL for those who don’t need a paid SSL, usually recommended for eCommerce sites. This way you can still provide end-to-end encryption for your visitors and mitigate the aforementioned errors and cyber attacks, regardless of whether you’re using a CDN or web application firewall (WAF). Below we’ll cover the best way to implement an SSL with Cloudflare.
How to Check Your Website Without Cloudflare
You may see this as a “how to” guide for penetration testers. That’s understandable. However, it’s important to understand how easy some attacks are to truly realize why you should work to mitigate them. Furthermore, the information below is discussed for many other benign situations such as testing a website before updating nameservers or transferring a domain to another registrar.
You may already know you can enable Development mode in Cloudflare to temporarily bypass caching. But anyone can edit their computer hosts file to force DNS queries of a domain to another server IP address regardless of your authoritative DNS records.
If the yourwebsite.com A record is 1.2.3.4, but I want to rebuild the website on another server, I can simply add this to my computer hosts file to redirect all requests from my computer to my new server instead.
9.8.7.6 yourwebsite.com www.yourwebsite.com
Now, my computer treats my staging server as the true yourwebsite.com.
In some cases it is easy to bypass a CDN or WAF to find a website’s origin IP address. This is the basic concept behind many DNS cache poisoning attacks on workstations, network routers, and rogue Wi-Fi access points (WAPs).
If your domain is pointed to Cloudflare’s name servers, you can edit the hosts file to check if your website redirects to HTTPS without enabling Cloudflare Development mode — which affects all users.
The Fix – Cloudflare CA-Issued SSL Certificates
In the past, the only option for using an SSL with Cloudflare was to install AutoSSL on your cPanel server and force HTTPS in your web server configuration. Cloudflare now offers Origin CA-issued certificates for a single SSL to fully encrypt traffic from the origin server to the user.
- Log into Cloudflare.com.
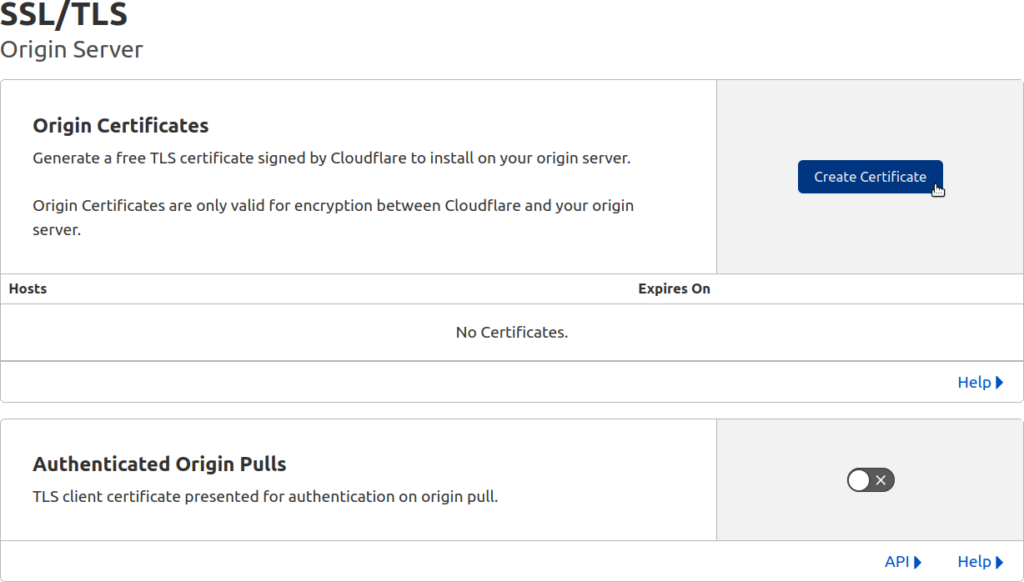
- On the left select “SSL/TLS” and “Origin Server.”
- Select “Create Certificate.”

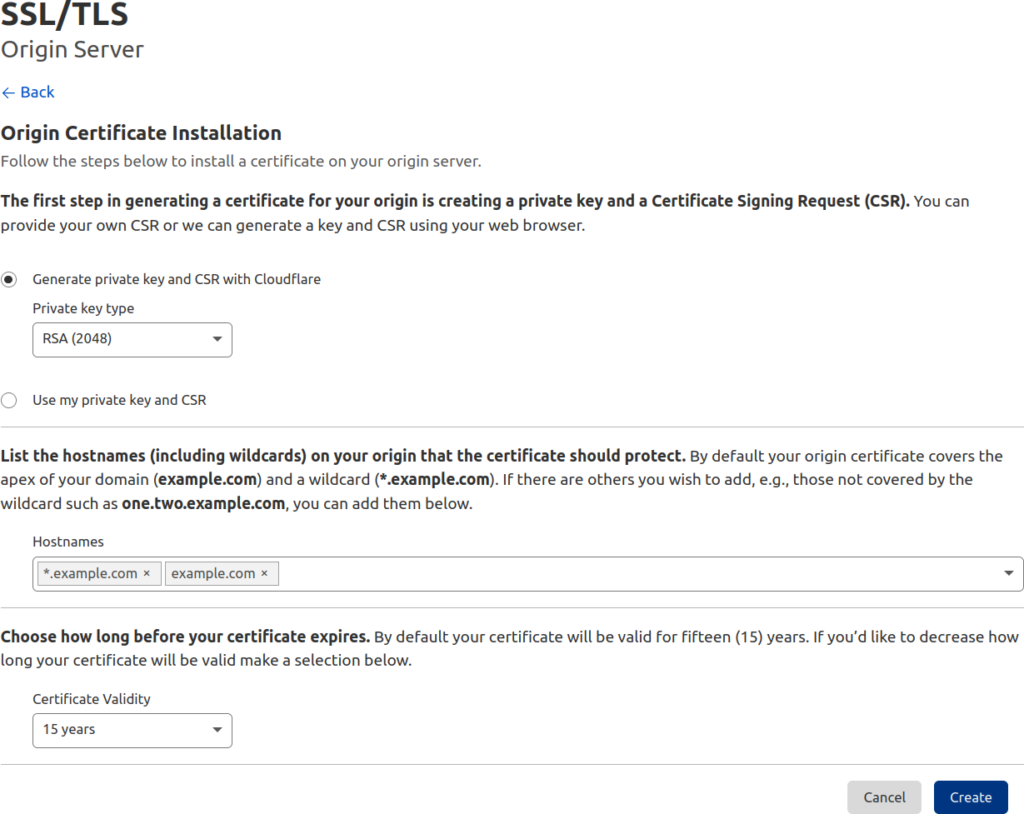
- Select “Generate private key and CSR with Cloudflare.” Add all domains from your server. Finally, specify the certificate validity (15 years by default).

- Select “Create.”
- Copy the private key on the next page.
- Log into cPanel.
- Select “SSL/TLS.”
- Select “Generate, view, upload, or delete your private keys.”
- Select “Upload a Private Key.”
- Paste the Cloudflare private key under “Upload a New Private Key.” Add a description to help you remember the SSL is from Cloudflare.

- Select “Save” at the bottom.
- In Cloudflare on the left select “SSL/TLS” and “Overview.”
- Change Flexible to “Full (Strict).”
- Check your website in a private browsing session.
- Firefox users can select the lock icon to the left of your domain, then “Connection secure.” You should see “Verified by: Let’s Encrypt.”
Ensure you’ve 301 redirected all website traffic to HTTPS.
Troubleshooting
If the SSL still states verification by cPanel, try the following:
In Cloudflare, select “Caching” > “Configuration” > “Purge Everything.” Check your website after a few minutes.
If that doesn’t work, in cPanel select “SSL/TLS” > “Generate, view, upload, or delete your private keys.” Delete the cPanel private keys for the domain connected to Cloudflare.
HTTP Strict Transport Security (HSTS)
Consider enabling HTTP Strict Transport Security (HSTS) as well to further protect against downgrade attacks.
This article is missing an important step. You also need the origin certificate Cloudflare creates and need to upload it to cPanel, and then install the certificate and private key onto the domain. As of right now following these instructions, all it’ll do is cause browser errors.
Hello Nathan – per Cloudflare’s documentation (https://www.cloudflare.com/ssl/ – regarding Full SSL), the Cloudflare SSL certificate is NOT required for the installation. They state that you have 3 options: “one issued by a Certificate Authority (Strict), one issued by Cloudflare (Origin CA), or a self-signed certificate.” If you can point to instructions where it is required, please provide us a link and we can review it once again.
The word ‘crypto’ (step 4) doesn’t appear anywhere on the page indicated. Nor is it found in cloudflare’s support files when a search is cone. A Google search produce perhaps 4 seemingly unrelated references. Article becomes useless at step 3. Does it need updating?
Thanks for pointing this out. The article has been updated.