In this tutorial:
In this tutorial, we will show you how to Optimize and Compress images in WordPress. We will use the free Smush Image Compression and Optimization plugin. First, we will walk you through installing the plugin, then compressing and optimizing images in WordPress.
Install Smush Image Compression and Optimization
- Log into your WordPress Dashboard.
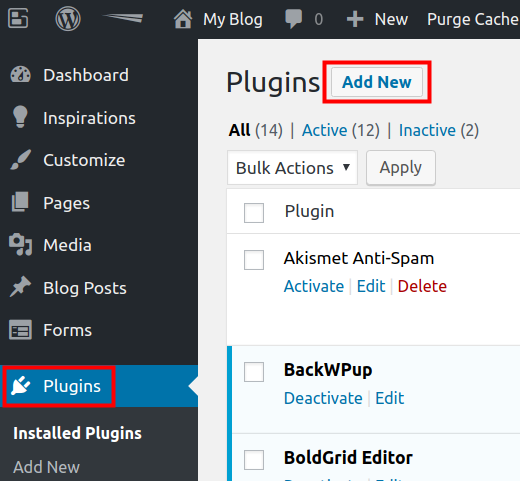
Click Plugins, then Add New.
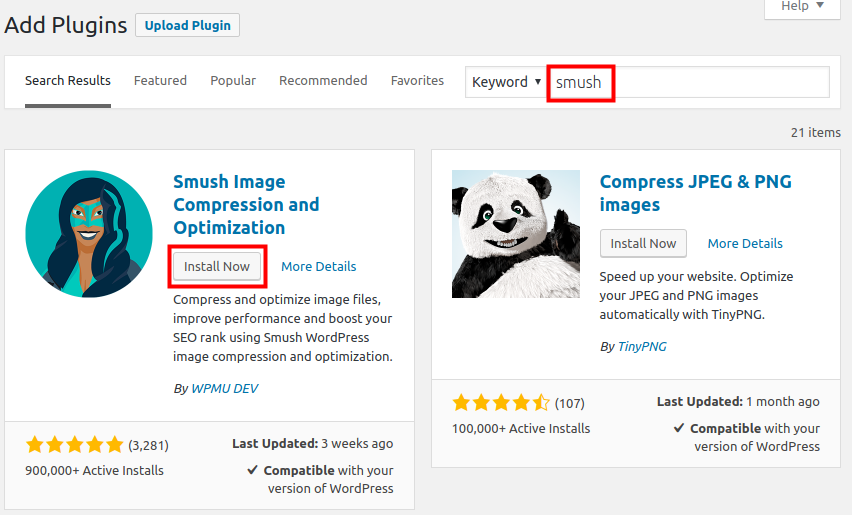
Type ‘smush’ in the search field. When you see the Smush Image Compression and Optimization plugin by WPMU DEV, click the Install Now button.
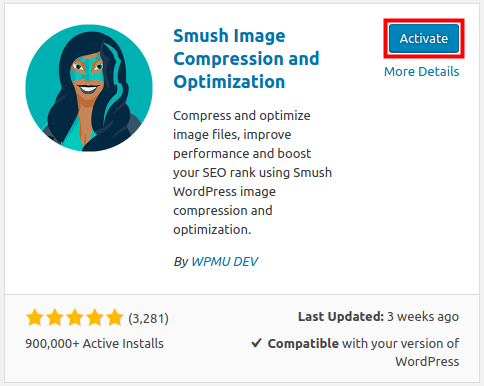
Once it has installed, click the Activate button to enable the plugin.
Optimize & Compress Images
Now that you have installed the Smush Image Compression and Optimization plugin, we will show you how to use it to opimize and compress images in your WordPress site. Since we are using the free version, it can only bulk process 50 at a time, so this may take several tries to complete.
- You should already be logged into your WordPress.
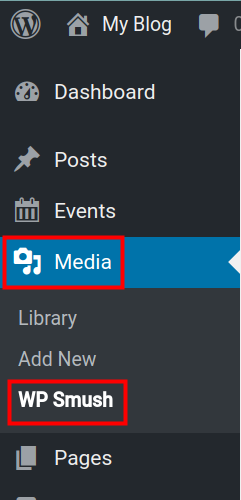
Click Media then WP Smush.
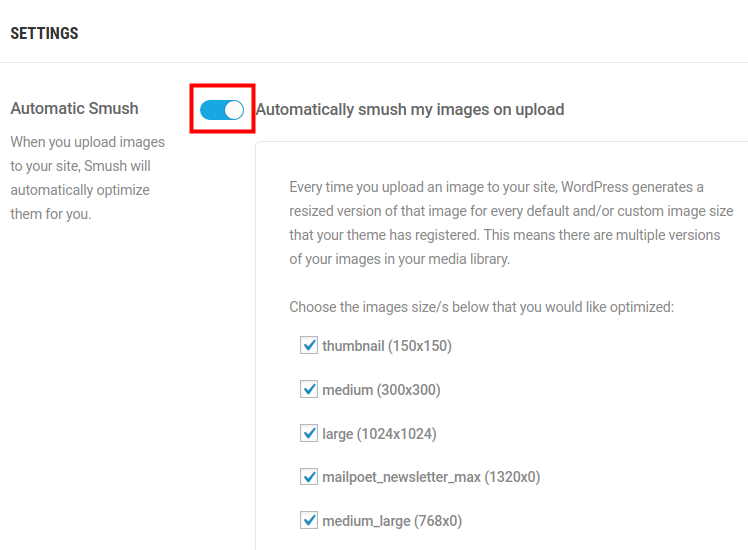
I recommend scrolling down to the Settings section and enabling Automatic Smush. This will cause any new images to be compressed and optimized when they are uploaded.
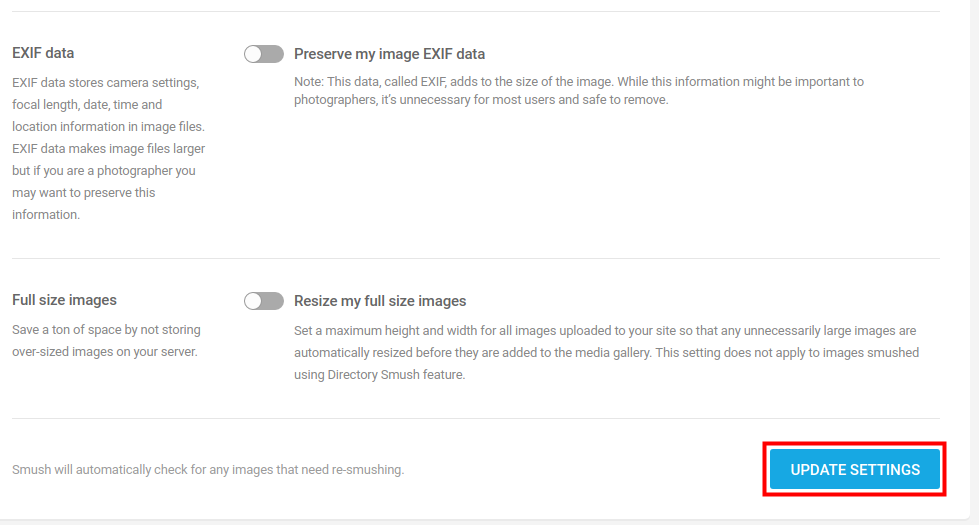
Then, click the Update Settings button.
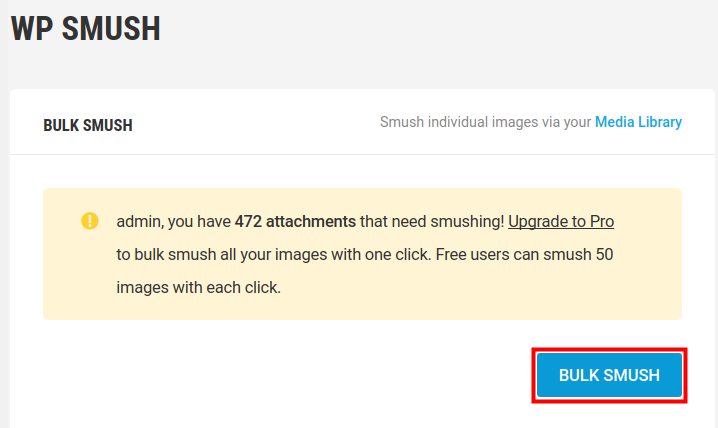
Click the Bulk Smush button to begin optimizing and compress existing images.

It will then begin processing your images.
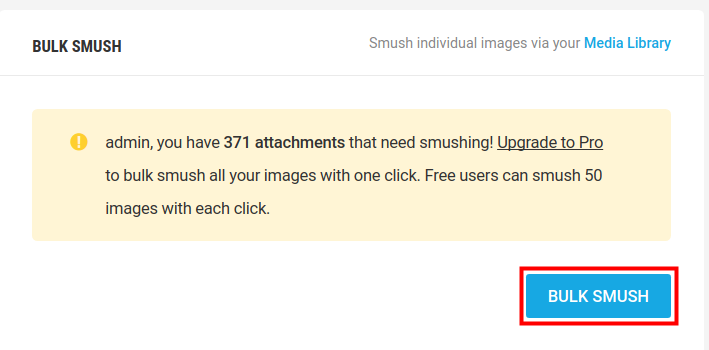
After processing 50 images it will stop, click the Bulk Smash button again. Repeat until it has processed all of your images.
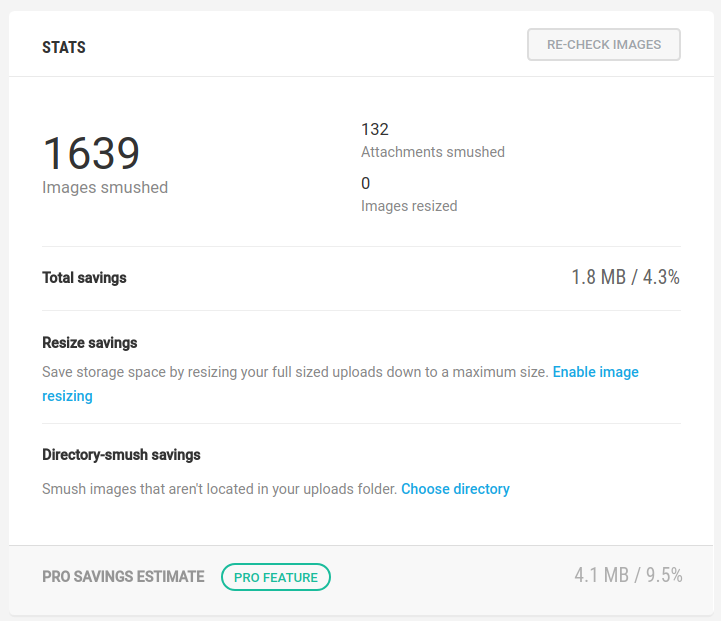
The Stats section will list how many images were optimized and compressed.
Congratulations, now you know how to Optimize and Compress images in WordPress with the Smush Image Compression and Optimization plugin!
For further reading, check out Using Inline Images versus the Image Block.
Become a master of WordPress plugins! Protect, optimize, secure, and expand the functionality of your website easily with the help of WordPress plugins!
I want to share my 2017 year experience in Google Pagespeed images optimization for my website:
I have tried free version of WP Smush, but Google Pagespeed still had issues to my images. Then I read that in September 2017 Google Pagespeed changed the rules of the game, and now it wants all images to be smaller then webp q75 + 10%. I tried to achieve that with MozJpeg encoder, but resulting images had terrible artifacts.
So as I understand there is no way now to achieve high score in Google Pagespeed, except using webp images. I used free plugin Opti MozJpeg Guetzli WebP to create webp duplicates for each image in my media library. Now I have two files for each thumbnail (original and webp). If browser supports webp, it gets webp duplicate, If not – original image. It is achieved by the following code in .htaccess:
<IfModule mod_rewrite.c> RewriteEngine On RewriteCond %{HTTP_ACCEPT} image/webp RewriteCond %{REQUEST_URI} .*(jpe?g|png|gif)$ RewriteCond %{DOCUMENT_ROOT}/$1.webp -f RewriteRule (.*) $1.webp [T=image/webp,E=accept:1] </IfModule> <IfModule mod_headers.c> Header append Vary Accept env=REDIRECT_accept </IfModule> AddType image/webp .webpThanks for your contribution to the Community! We appreciate that you are willing to share your knowledge and experience to assist others. Kudos!