The easiest way to install WordPress is to use the WordPress Softaculous installation. This is available if you are an InMotion Hosting customer. If you are not, then you will need to perform a manual installation. The following tutorial will walk you through a manual installation of WordPress.
Manual WordPress Installation Instructions
Before we begin the installation of WordPress with the files that you get from WordPress.org, you will first need to create the database for WordPress to work.
Create Database
If you are not an InMotion customer, then you will need to be familiar with how you can create a database with your host. The following instructions are for cPanel using the MySQL database options there.
- Login to cPanel
- Click on MySQL Databases
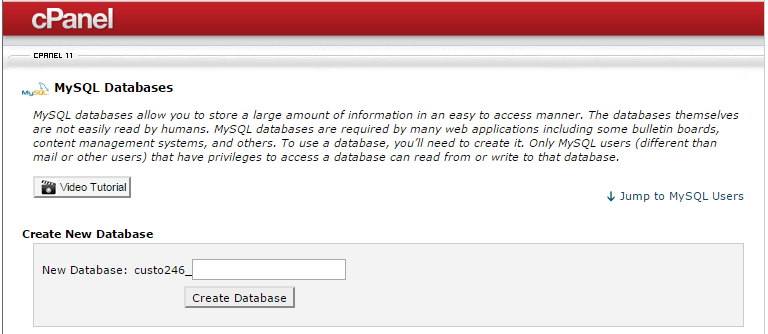
In the Create Database field, add a name for your database. For example, you might add the name as “wpdb411”. Note that InMotion accounts will include a prefix to any database name and user. If the prefix was “pre123” and you typed “wpdb411” in the entry field, then database name will be “pre123_wpdb411”. Note that the “_” is part of the name.
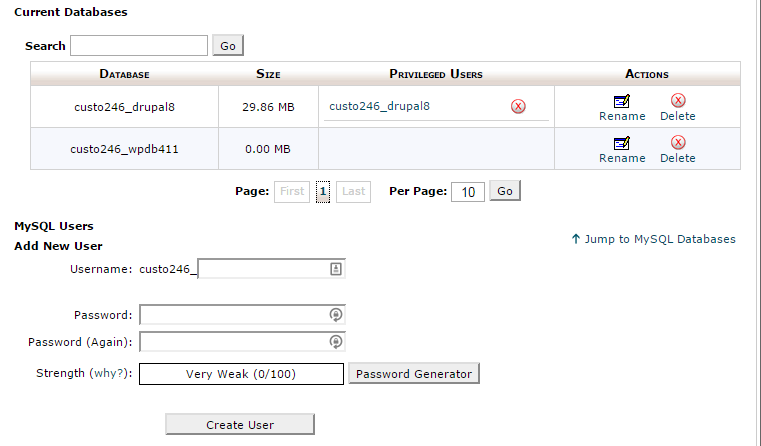
Next, scroll down and create a MySQL user. Type in a user name in the blank field after the account prefix.
- Use the Password Generator or type in a password for your new user. Make sure that your password is strong and that you have it saved/copied in a secure location (don’t forget it!)
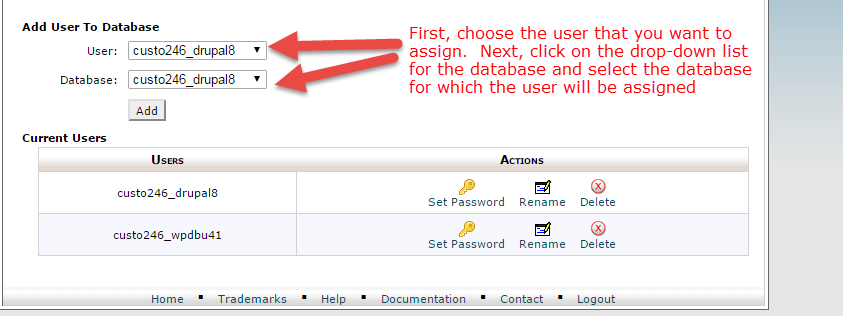
Next you will need to assign the User to the database that you have created. At the bottom of the page, go to the section labeled ADD USER TO DATABASE. Select the user that you created buy clicking on the drop-down arrow next the user.
- After selecting the user, use the same process to select the database that you created earlier. You will see the database field directly below the user that you just selected.
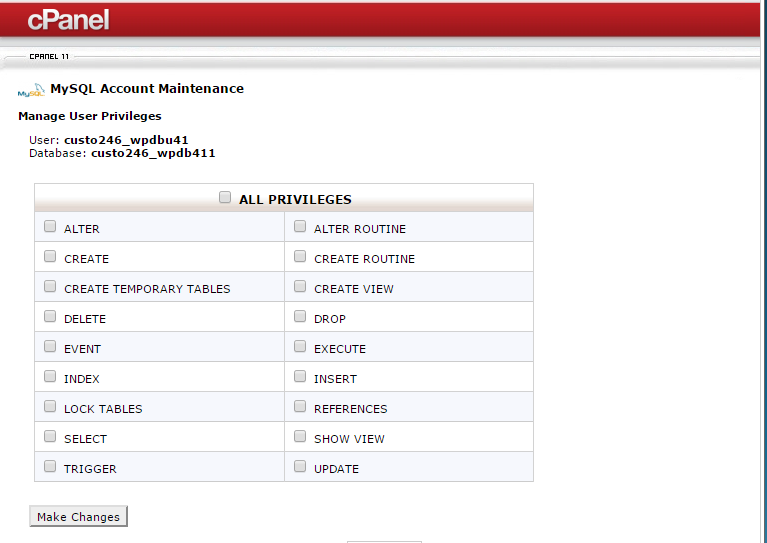
Click on ADD. You will then see all of the privileges that can be assigned to the user. Click on ALL PRIVILEGES, then click on MAKE CHANGES to save your selection.
- Record your database name, user name and the password as they will be needed in the WordPress Setup.
Installing WordPress onto the Web Server
Now that your database is setup, the next part of the installation involves downloading and using the WordPress installation file. WordPress refers to it as the Famous 5-Minute Install. For the novice, the tricky part will be understanding how to download, place the files on the server, and uncompress the files into the correct location. However, the instructions we provide will help you understand each task. You are welcome to use your favorite FTP client for the file movement. We will be referencing the cPanel File Manager when working with the files on the web server.
Download the WordPress install zip file clicking on this link.
If you are installing WordPress at the root of your domain, then upload the WordPress Zip file into the public_html folder. The public_html is considered the default root for InMotion Hosting. If you are installing it elsewhere, then make sure that the Zip file is in the root folder of the location you intend to use. cPanel File Manager (InMotion Hosting) allows you to extract a zip file. If your hosting service includes an interface that cannot extract compressed files, then you may need to extract the files first, then use an FTP client to upload the files into the root folder. Please see Getting Started with FTP for more information.
A root of the domain installation means that if your domain name is domain-name.com, then your WordPress URL will be https://domain-name.com. If you choose to install the domain to a subdomain or folder under the root, then the URL may look like this: https://domain-name.com/subdomain
- After you have completed downloading the installation, you will need to upload the WordPress ZIP file into the installation location on the web server.
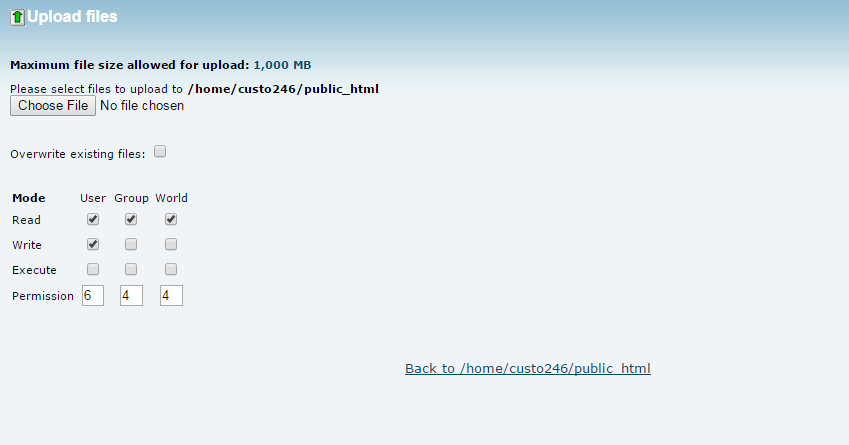
Once the file is uploaded into the installation location, you will need to uncompress the file. Follow these directions if you are hosting with InMotion Hosting. If you uncompress the WordPress installation zip file on your computer instead of through the cPanel File Manager, it is highly recommended that you use an FTP client to move the files into place.

Using File Manager, uncompress the WordPress file. This will result in a folder called WORDPRESS being created in the public_html folder.
- By default, the zipped WordPress installation file will create a folder labeled WORDPRESS with all of the files in it. You will need to MOVE all of the files and folders into the PUBLIC_HTML root. Double-click on the WORDPRESS folder to open it.
- Click on SELECT ALL (at the top of the File Manager) to select all of the files
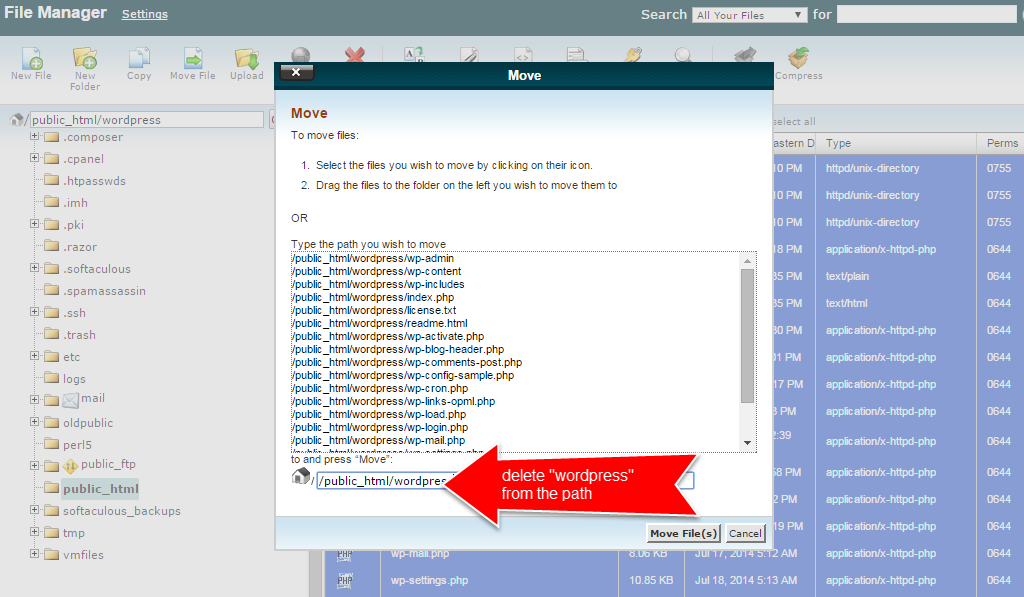
Click on MOVE – backspace over “wordpress” to remove it from the path, then click on the MOVE FILES button. After the move is complete, delete the empty WORDPRESS folder (it willl be empty since you moved all of the files and folders out of it)
- Once all of the files are in place, you will be doing the “Famous 5-minute install” created by WordPress. If you want to see the instructions they have provided, click on the link provided.
- Log into your favorite internet browser, then run wp-admin/install.php based on your domain name. If your domain name is domain-name.com, then the installation URL would be https://domain-name.com/wp-admin/install.php
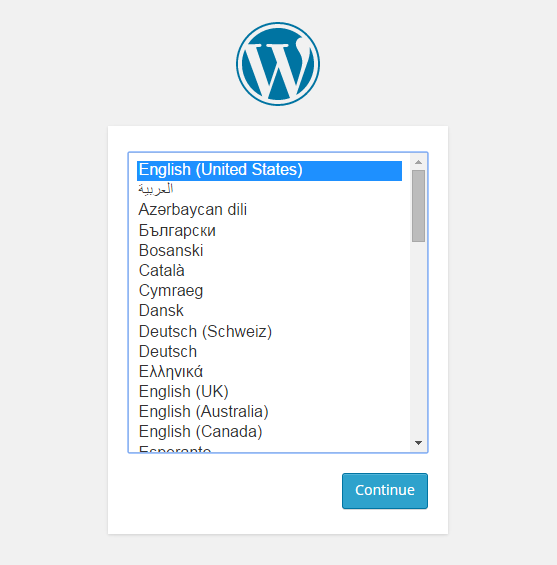
Select your language
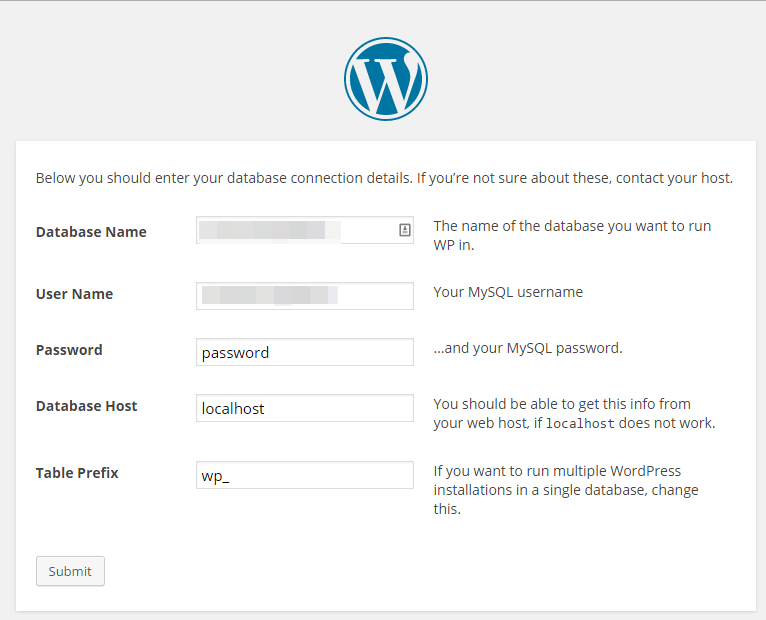
Fill in Database info
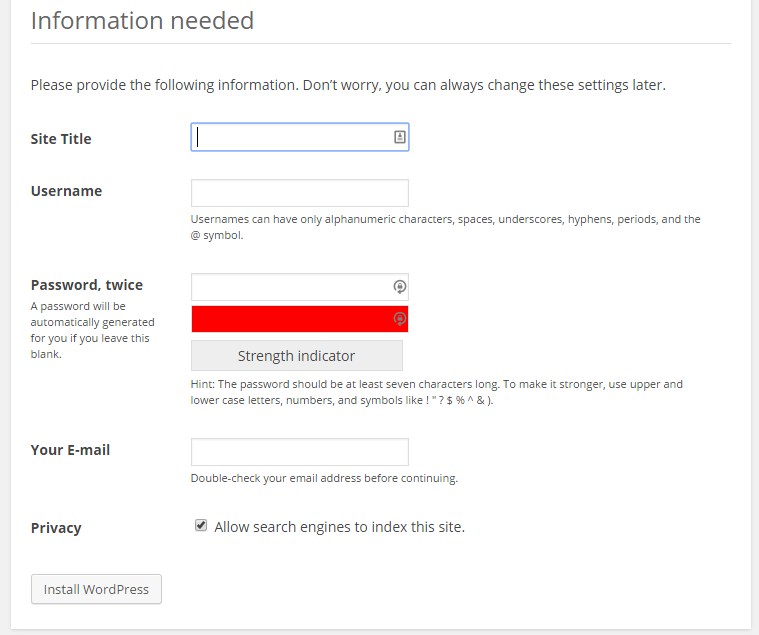
Begin the site install. Fill in the Site Title, Username, then add a password and email. You will also have the option to allow search engines to index the site.
- Click on the Install WordPress at the bottom of the page.
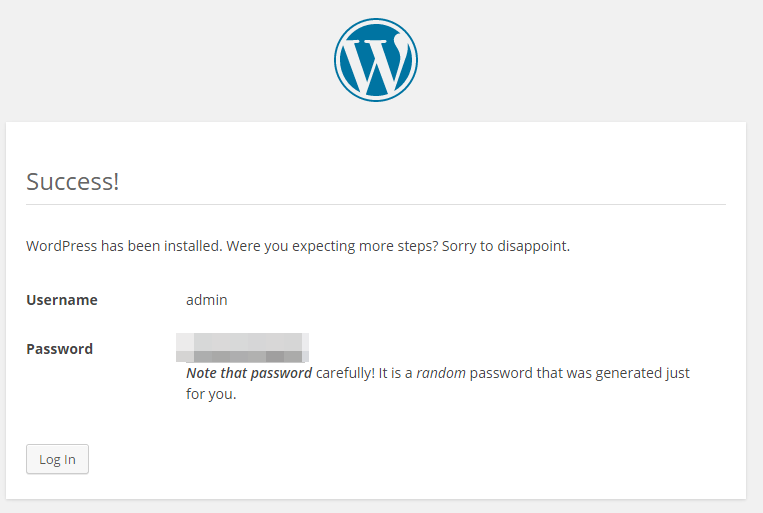
When the install completes you will see a SUCCESS message and then a user name and a generated password. Make sure to record the password and then click on the Log in button to login to the WordPress Administrator. Make sure that you click on the button to test your login and check to see that WordPress is working.
Congratulations you have completed a manual WordPress installation!
I need to install softaculous software into VPS Hosting.How can i?
Hello Muanf,
You can obtain a Softaculous license for your VPS by going into the Account Management Panel (AMP). Check out this article for more details: How to Purchase a Softaculous License in AMP. As per the article, once you have purchased the license, our Systems team installs it on your VPS.
I hope this helps to answer your question, please let us know if you require any further assistance.
Regards,
Arnel C.