
In this tutorial, we show you how to setup DMARC records in cPanel to specify how mail servers should handle messages from your domain that don’t have valid SPF and DKIM records setup. Since the DMARC standard is used by many email providers (such as Gmail, Yahoo!, AOL, Hotmail, Outlook), it increases your chances of email being delivered successfully. We provide basic DMARC record examples below.
DMARC Setup Steps
- Login to cPanel.
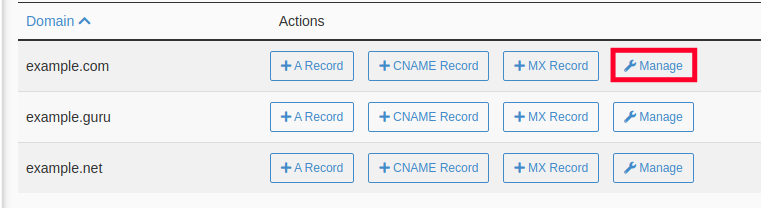
- Click Zone Editor under Domains.

- Click the Manage button next to the domain you want to work with.
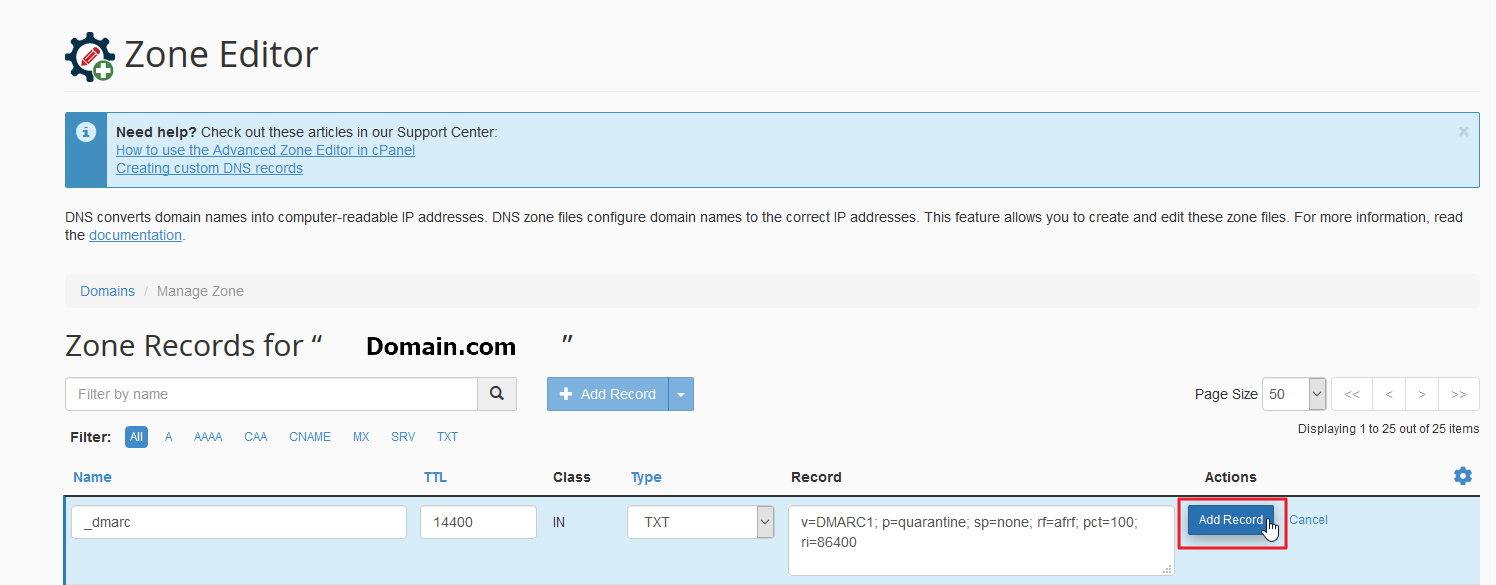
- Click the +Add Record button.

- Change the Type from A to TXT.
- Enter the Name, TTL, Type, and Record as described below. Keep in mind that you must select one of the following options for the Record field: None, Reject, or Quarantine.
Field Setting Name _dmarc TTL 14400 Type TXT Record In this field you must choose how you want recipient servers to handle email from your domain that fails SPF/DKIM validation. Options are outlined below in red:
None:v=DMARC1; p=none; sp=none; rf=afrf; pct=100; ri=86400
Reject:v=DMARC1; p=reject; sp=none; rf=afrf; pct=100; ri=86400
Quarantine:v=DMARC1; p=quarantine; sp=none; rf=afrf; pct=100; ri=86400Alternately, you can request an email report of failed DMARC validations by adding a valid email address, such as the following:
None:
v=DMARC1; p=none; sp=none; ruf=mailto:[email protected]; rf=afrf; pct=100; ri=86400
Reject:v=DMARC1; p=reject; sp=none; rf=afrf; pct=100; ruf=mailto:[email protected]; ri=86400
Quarantine:v=DMARC1; p=quarantine; sp=none; ruf=mailto:[email protected]; rf=afrf; pct=100; ri=86400- Click Add Record to save your record.
Note: In Zone Editor, typing “_dmarc” will autopopulate the domain.
You will then see your record listed in the Zone Records section.
Congratulations, now you know how to setup DMARC records in your cPanel for email validation.
Are you a small business? Then you know that having your emails successfully delivered to the recipients is only half the battle with email marketing. InMotion’s Shared Hosting plans include a number of helpful tools to take your email marketing game to the next level.
7 Comments
Was this article helpful? Let us know!
- Click the Manage button next to the domain you want to work with.
yes it works for me and help me.
I don’t understand this comment:
Note: In Zone Editor, typing “_dmarc” will autopopulate the domain.
When I did this, it just expanded the first field to say:
_dmarc.[mydomain].com
but didn’t do anything else. Since that seemed wrong, I re-edited that field to
[mydomain].com.
and filled in the TXT contents from your other examples.
Hello Henry – thanks for your post about using “_dmarc” to autopopulate the domain. It is possible that current updates to the cPanel have changed the command. We are currently researching this and will update the article after confirming and needed change.
Nope, turns out the comment is 100% right after all. Type: _dmarc then tab out, and it will fill in _dmarc.yourdomain.com, which is totally correct. A number of tools apparently depend on the _dmarc prefix being there in order to do their jobs.
Thanks for the update, Henry. I’ll pass that along to the team.
Thank you so much its save my day…………
Glad it helped!