Why DNS and Nameservers are Important
Domain names are important because they are what people type into a browser in order to see your content or application. DNS entries are important because they include the address of your site, different records that provide instructions about your domain, and the nameservers that identify where to find the DNS entries that apply to your domain.
Understanding the different DNS entries and how to change them is critical in keeping your website properly configured. Note that this article pertains to DNS entries made and maintained within the cPanel interface.
Please be aware that it may take up to 24 hours for DNS changes to take effect. More info on this can be found in, How long do DNS changes take?
Nameservers for Shared, VPS, & Dedicated Accounts (not Resellers)
When updating your domain’s nameservers to point your domain to InMotion Hosting, you will need to use the following nameservers:
| Hostname | IP Address |
|---|---|
| ns1.inmotionhosting.com | 74.124.210.242 |
| ns2.inmotionhosting.com | 70.39.150.2 |
Nameservers for Resellers (Not Shared, VPS or Dedicated Accounts)
When updating your domain’s nameservers to point your domain to a Reseller account, you will need to use the following nameservers:
| Hostname | IP Address |
|---|---|
| ns1.servconfig.com | 216.194.168.112 |
| ns2.servconfig.com | 70.39.146.236 |
As a reseller you can also use custom Nameservers, here is a link to our guide on Using Custom Nameservers as a Reseller.
DNS Record Types
Common DNS entries include A records, CNAME records, MX records, Nameserver records, and TXT records. These records have various purposes, but they provide information on how your domain should be handled. So, for example, if you wanted to redirect a subdomain to a different location, then it would use the DNS information to do that.
DNS entries also include mail server settings, security settings, and other application records that can be recorded in TXT files.
- The Complete Guide to DNS Records
- How to Set MX Records using the cPanel Zone Editor
- Setting Domain MX Records to Remote Settings in cPanel
- How to change your MX Records using the WebHost Manager (WHM)
- Wildcard Subdomains and DNS
- How to Enable DNSSEC with CloudFlare
- How to Use the Track DNS Tool in cPanel
- WHMCS – “Use an existing domain and change the nameservers” Not Working
- Performing a DNS Cleanup in WHM
- How to Set Up Custom Nameservers for Resellers
Changing your Nameservers
The nameservers determine where the active and accurate DNS records for a domain lie. They point to the authoritative DNS server. Since domains can move from one domain registrar to another, there needs to be a system in place that could help identify where the applicable DNS records for the domain are located.
Your nameservers will need to be updated at your domain’s registrar, such as GoDaddy or Network Solutions. If you’re unsure how to update your nameservers, please contact your current registrar for further assistance.
If you require help finding the domain registrar for your site, you can contact our technical support team, or you can it yourself by going to ICANN Lookup page. Type in your domain name and you will see the domain information.
Understanding your domain’s DNS entries and how to change them will help you in many ways. It will help you keep applications properly running with needed DNS entries, content properly displayed when you’re updating your site, and your website available to your viewers should you move to a new hosting service. Use our articles to learn more about DNS so that your website journey remains a success.
If you have a VPS or Dedicated server, check out our guide on Modifying DNS in WHM.
Changing your DNS Servers in the Account Management Panel (AMP)
You can also change the DNS servers in the AMP interface. Follow the steps below to see how can make the changes. If you’re simply pointing the Note that you will need to have your Custom Nameserver information if you intend to use custom nameservers. You can obtain it from your domain registrar or from the entity that has set up the nameservers for you. (e.g. using Cloudflare nameservers).
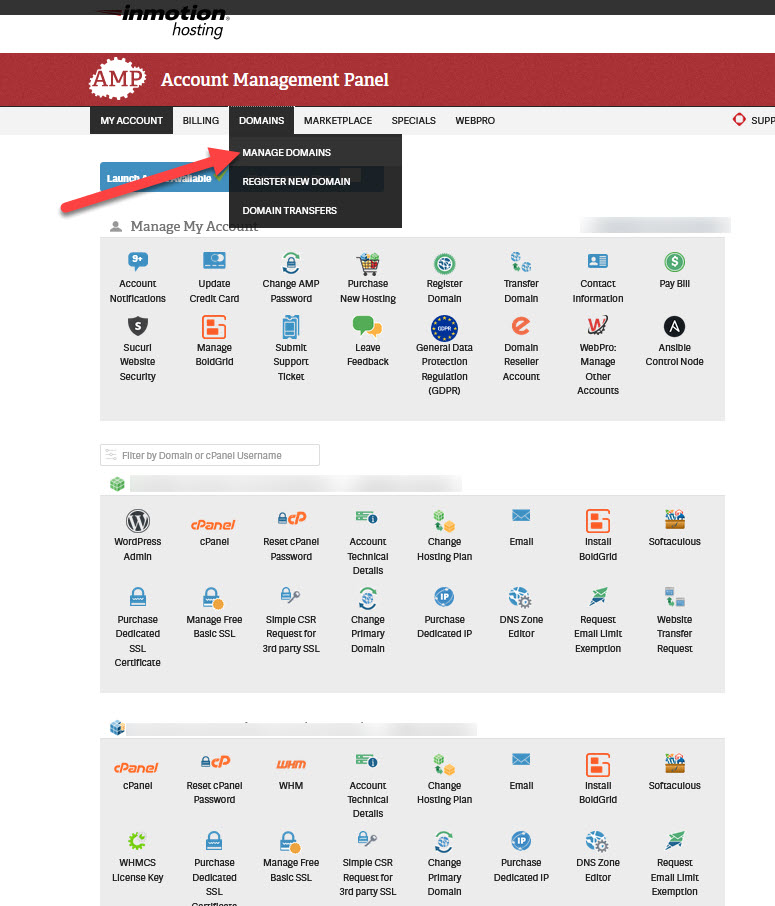
- Log into AMP.
- In the menu at the top of the screen click on Domains, then click on
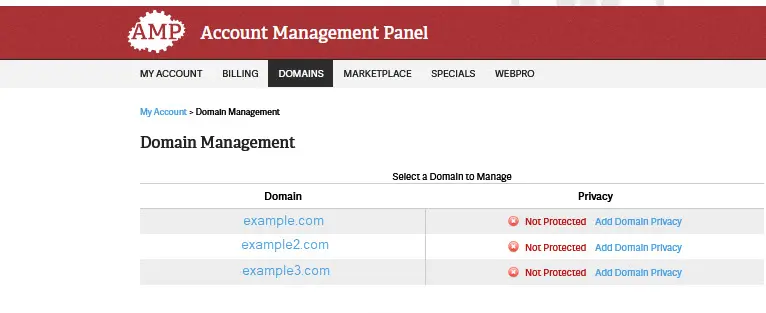
- Next, you will need to select the domain where you want to add the nameservers.
- You will then see several choices to manage the domain. If you’re not sure what to use, then contact our live technical support team for assisstance.
If you’re simply changing the nameservers to point to another location, then you can select Point your domain.
To change the nameservers to a custom nameserver, click on the last option labeled Custom Nameservers. If you’re simply changing the nameservers to point to another location, then you can select Point your domain.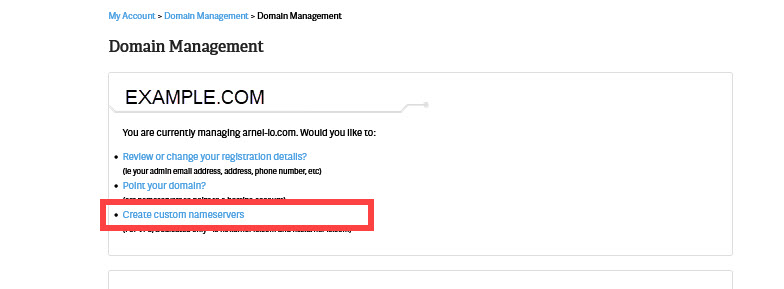
- You will then need to add the information for your nameservers on the next page.
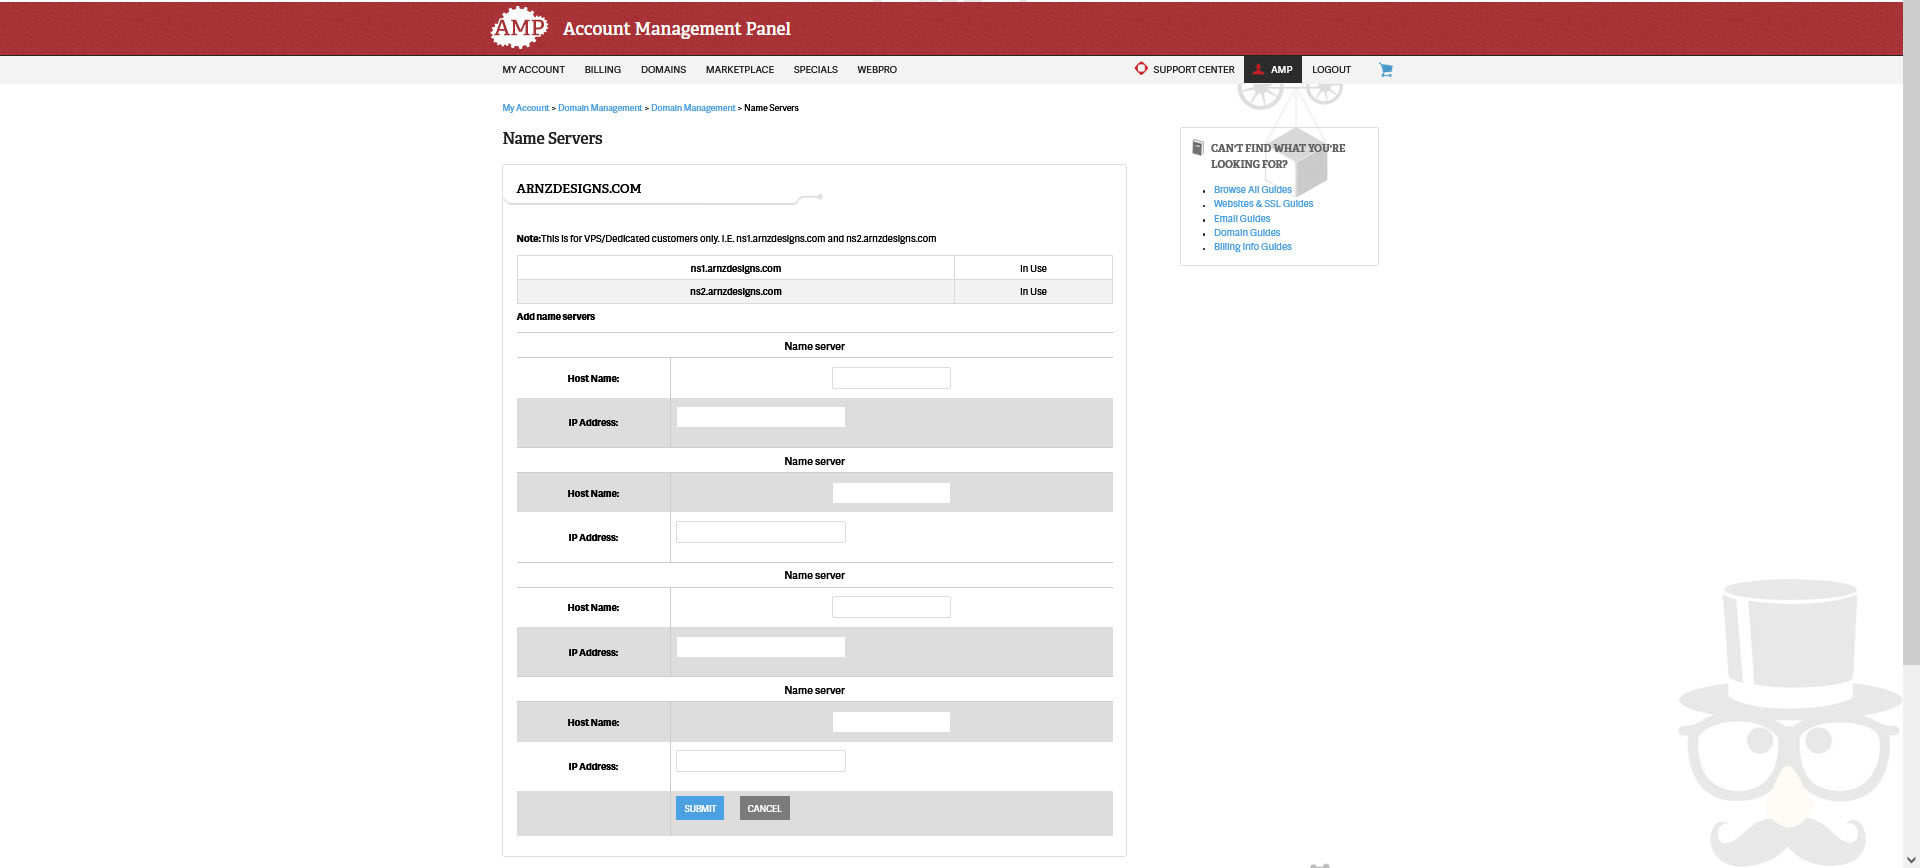
- Once you’re finished, you can click on the blue SAVE button at the bottom of the page to save your changes.
Changes to the nameservers may take only take a few hours or up to 24 hours. If you have any problems with the change, make sure to contact our live technical support team for immediate assistance.
To learn more about adding Custom Nameservers, please see How to Change your Nameservers in AMP.
Latest Tutorials for DNS and Nameserver Changes
- The Complete Guide to DNS Records
- DNS and Nameserver Changes
- WHMCS – “Use an existing domain and change the nameservers” Not Working
- How to Enable DNSSEC with Cloudflare
- How to Use the Track DNS Tool in cPanel
- Performing a DNS Cleanup in WHM
- How to Make DNS Changes at Namecheap.com
- Wildcard Subdomains and DNS
- How to Set Up Custom Nameservers for Resellers
- Making DNS Nameserver Changes at GoDaddy.com